Chinese Chippendale Chairs | Real Time Progress - Fabric Selection

Hey! Today, I'm sharing another real time update for our Chinese Chippendale Chairs (see here and here to see our progress) Currently, I'm finalizing the fabric selection.. why my delay? I don't have a specific room in mind, so I want to make sure they are very versatile! It's hard to make a decision when I'm not looking at the other fabrics in the space!


Option 1. Charcoal velvet - I purchased this for another project, but I'm considering using it here .. I was originally thinking something lighter, but this is still definitely a possibility. 

Option 2 - Warsa Linen from Gray Lines Linen. I ordered a swatch card last week. I'm considering Oatmeal. (My other favorite swatches from the card are: Celander, Lime, New Turquoise, Jade, Fuchsia, and D. Grey) 


Option 3 - Metallic Linen from Gray Lines Linen. So many options, but ML 55, ML 56, ML 65, MM 40 caught my eye. 

So, have you used any of these? Do you have a favorite from here or elsewhere? I'll be deciding today!

How to Pick the Perfect Gray Paint Color

I spent a good bit of time last week staring at gray paint samples, so today, I thought I'd share how to pick out the perfect neutral to warm gray. Grays are tricky! Whatever you do - don't use the first one you find!!

So why are grays so tricky? They range from bluish cool grays, to brownish warm grays with neutral gray in between. Grays go blue very easily! For gray, I prefer a neutral to warm gray, so that's what I'll be talking about today. I also love a gray blue, but I prefer it to read more blue than gray (verse gray with blue undertones), so that's another post :)

When starting, here's what I recommend.

1. Pick out several samples (~10) or use a paint deck and look at them side by side. This allows you to easily determine the undertones 2. Look at the samples in the room that the paint will be in (at different points during the day, especially for wall colors). The light will make all of the difference! Don't skip this step!

Need a starting point? Here are my picks! (from Sherwin Williams and Benjamin Moore)


For a lighter gray, BM Gray Owl (neutral) or BM Hazy Skies (warm). These are great wall colors, also try them lightened 50% for a lighter look.

Medium to medium dark, SW Dovetail and SW Gauntlet Gray (neutral) and SW Anonymous and SW Porpoise (warm, brown undertones)

Medium to medium dark, BM Chelsea Gray, BM Amherst, BM Kendall Charcoal (neutral, but still very rich).

Medium, BM Galveston Gray, a little warm

Medium, BM Eagle Rock, warm with subtle brown undertones.

Dark, BM Dragon's Breath, rich, dark, gray with brown undertones.


For my Drexel Campaign dresser, I went with BM Eagle Rock (mixed in Sherwin Williams Pro Classic) - the perfect medium gray with very subtle brown undertones. I finished painting over the weekend, but I'm still trying to replicate the two missing handles, photos soon!

Finally, my top pick for a neutral gray (from above samples) BM Chelsea Gray and BM Kendall Charcoal - they are neutral, but still very rich!

If you're picking out gray paint soon, I hope this helps!!

Better Homes and Gardens Stylemaker Challenge | Full Video and Results

In September, I went to NYC to participate in BHG Stylemaker ChallengeThe challenge included designing a 4' wide gallery space - in 5 hours, with limited tools (no nails or screws!?) and a video team documenting it. No pressure! ;)  I had to go to plan C when plan A & B didn't work!! But in the end, I love how it turned out!


I've never done video before, so that was definitely a little nerve wracking!


In the end, I just focused on my project and process (I love working on the floor!) and did as much as I could in the time frame!


One of the best parts of the experience was meeting the amazingly talented BHG video team and the other bloggers, Jen and Stacy - seriously both SO sweet and talented (make sure to check out their blogs!), I can't wait to see them again at future events!  


A longer video of the challenge is now available on Portico TV, follow the link, click on Better Homes and Gardens and it's the first video on top. 

See the original video on Better Homes and Gardens here and my interview video here

Voting (by readers like you!) took place online, and I won!! I was so shocked, I thought any of us could have won. So if you voted for me, thank YOU!! :) 

New experiences are always a little intimidating in the beginning, but if you aren't stretching yourself, you're not growing! This blog has brought some amazing experiences that I'm so grateful for!! I started this blog on a whim, I had no idea that anyone would read - thanks SO much for reading and for your support! To continue growing, we're building a new site! So look for a brand new site design (and url) soon!! 

All images are still shots taken from videos on BHG.com and Portico TV.

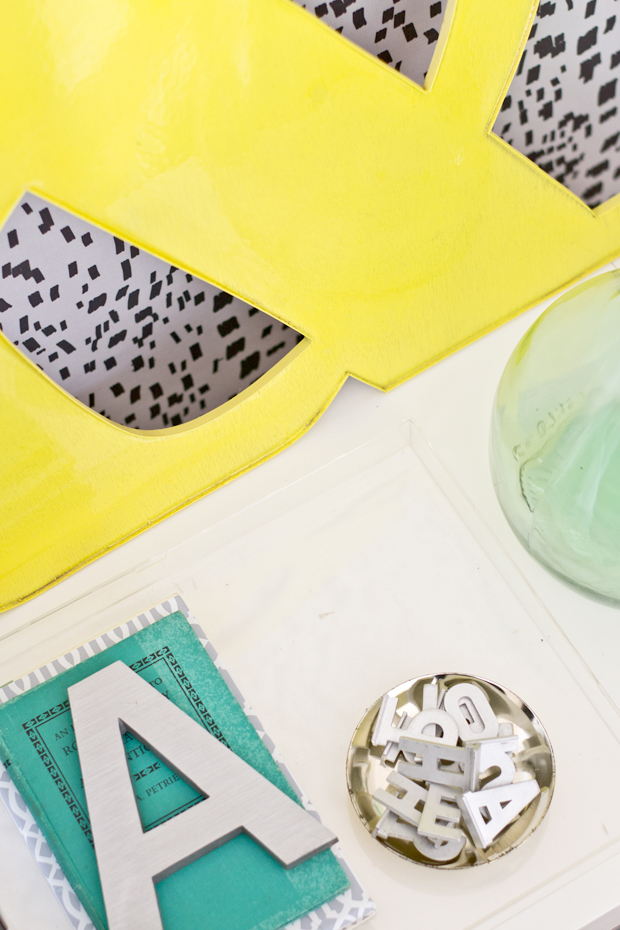
Large Glossy Vintage Inspired Letter | DIY Tutorial

Hey! I hope you had a great weekend! Today I'm sharing a simple, vintage inspired letter tutorial - perfect for a gallery wall or to lean on a dresser or bookshelf! If you missed the tutorial on Infarrantly Creative, read on!

I've admired large, vintage letters repurposed from buildings, but I've never found one within my budget .. Today, I'm going to show you how to make your own vintage inspired, glossy letter for just a few dollars!


This is super easy - promise! We were able to finish it in about 2 hours (not including resin drying time).


Materials:

1/4" Plywood or MDF (I used a 1/4 sheet)
Veneer edging (available at home improvement store in the lumber section)
Heat gun or iron (heat gun recommended, it is much easier and faster)
Spray paint
Resin (available at any craft store)

Tools:

Pencil
Jigsaw
Scissors
Projector (or free hand or get printed large scale at copy store)

To get started, print desired text on 8.5x11 paper and project onto 1/4" Plywood or MDF. Trace the outline with a pencil. If you don't have a projector, free hand if you're comfortable or get it printed large at a copy store, cut it out and then trace it. (Image below taken from my marquee letter tutorial).


Next, cut it out with a jigsaw. *Tip: when you get to a corner, back the saw out and cut at an angle towards the next point, go back once complete and cut off the extra pieces.


To cut any enclosed areas, drill a hole and then cut out with the jigsaw.


Next, apply the veneer edging. I used a leftover piece from my oversize cork board, so it's thinner than the standard edging. Just make sure that it creates a raised lip around the edge to hold the resin.


Carefully use the heat gun to apply the veneer edging, melting the adhesive. It helps to have an extra set of hands to hold the edging in place (away from the heat) while the other uses the gun. An iron can also be used, but a heat gun is a lot faster - also it would be tricky to use inside the letter.


Seal any gaps (on the back and joints) with glue to prevent the resin from seeping out or apply caulk on the front prior to painting (this is important, mine is a little thinner than planned since it seeped out some)


Spray paint the front. I used Liquitex Cadmium Yellow Light Hue

Get a glossy finish! Once the spray paint has dried, apply resin to the front. Mix per directions and carefully pour on top. To ensure even coverage, move the resin by picking up the letter and tilting it so the resin floats over the entire surface. Let it dry (24 - 72 hrs), per instructions, on a raised flat surface with cardboard or paper underneath. 


That's it! Enjoy your custom, affordable letter reminiscent of vintage building lettering!


This would be perfect in a gallery wall or simply leaned against a wall.


I love the glossy finish!


This was so easy, I can't wait to make more!


I hope you'll give it a try!!

Also in the tutorial:

Ikea Expedit Birch Plywood TV Stand

Fabric Panel wall 

p.s. check out my thrifted finds from the weekend (on Instagram) herehere and here!
Friday Five | 11.7.14


Hey!! I hope that you had a great week!! Here's a few of my recent favorites!

Please pin from original source provided below the photo, thanks! 


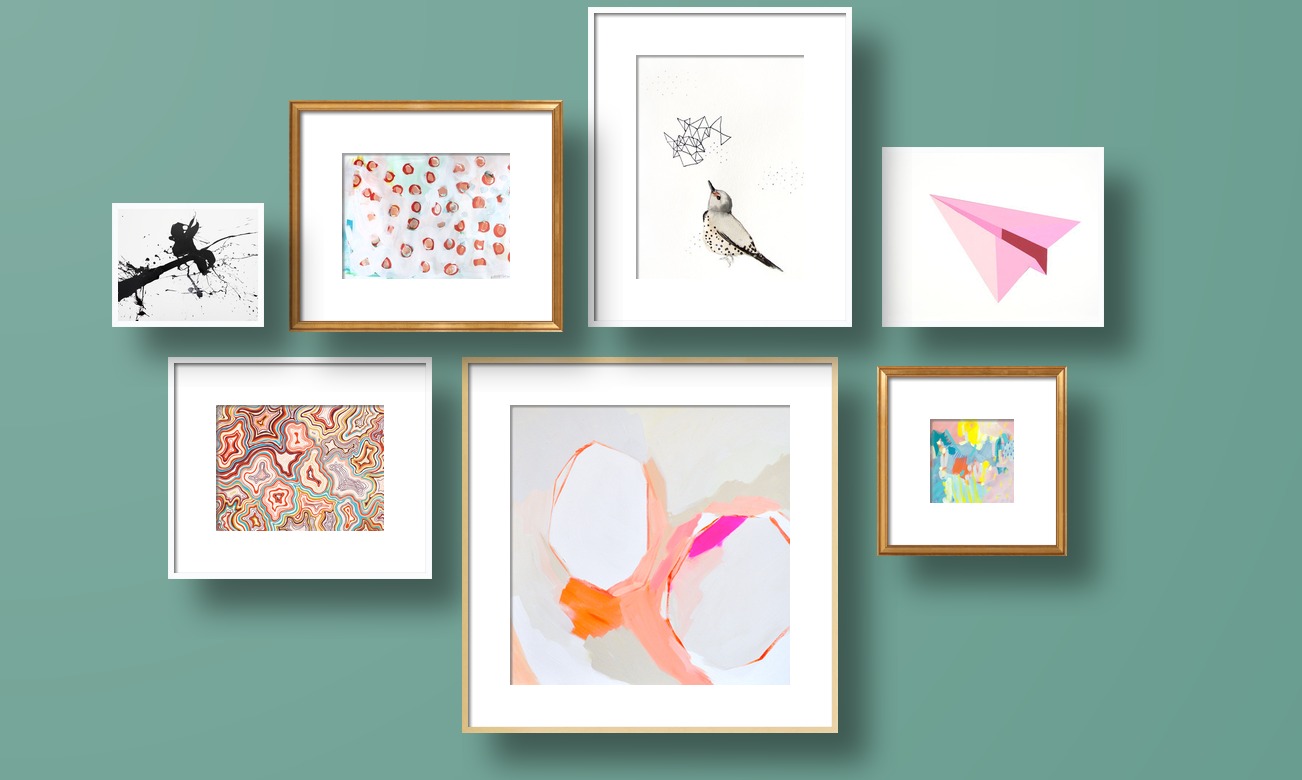
I frequently get asked how to put together a gallery wall - if you're feeling stuck, check out Artfully Walls! They've put together several curated collections. You can purchase the complete set or just a few pieces! Browse the collections here

artfully walls
Also, make sure to head over to Dream Green DIY to see how I and five other designers styled the curated Better Homes and Gardens collection


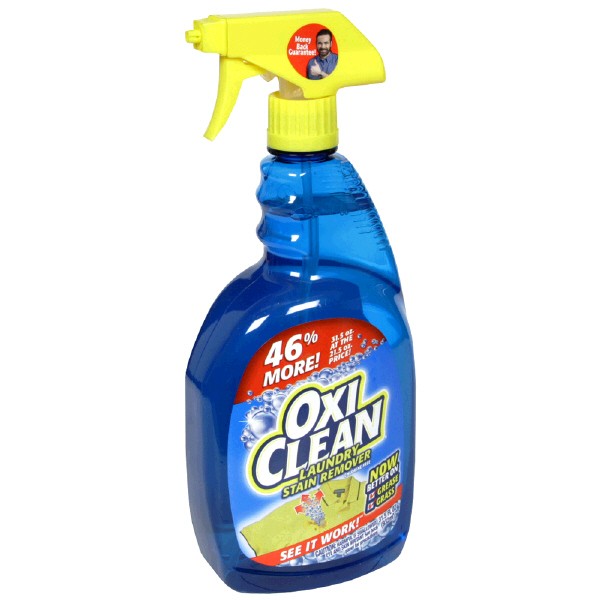
I recently inherited a sofa from my Grandparents that had a few set in stains (like a few years old ..) I've used Oxi Clean for a few years and had great results, so I decided to give it a try! It required just a little scrubbing and the stains were completely gone. I used the spray on version, but the powder version works well too!! (this isn't sponsored .. I just like sharing what's worked for me!) 


Did you catch the Fall In Love room reveal this week? Head over to Primitive and Proper to see all of the room reveals!

head over to Primitive and Proper for all original sources

Also, thanks so much to Leah Remillet for featuring my flamingo print (free printable here) in her recent office reveal, check out the whole office makeover here!


Looking for some DIY art ideas? Check out these two DIY gold foil print tutorials! 

via jenny collier
via the house of wood

I've been dreaming about pendants for our future kitchen, this oversize cone pendant is similar one that I shared the other week. (These are paper shades, so they might be best outside of the kitchen, if close to grease, etc.) 

shades of light

I hope you all have a great weekend!! :) I've decided to ignore that fact that we're in TN short term (since our time here got extended .... till .. I don't know yet) So I'll be putting together a full apartment tour, I'm SUPER excited to have a complete space, so I'll be in full design and DIYing mode for the next few weeks. Stay tuned!! 

Three Projects | Progress + Updates

Hey! I wanted to give you a project update .. we currently have three in process. Normally, I like to work on one at a time, but I got so excited about multiple projects at the same time! This tends to happen a lot :)

1.

First, our Chinese Chippendale chairs .. no updates. They need one more coat of primer, and then the top coat. I'm still deciding on fabric. (progress and updates here and here)


2.

I stalked this Drexel campaign dresser at my thrift store for the past few months, it was missing two pulls and had damaged wood .. at $70, it was a little pricey. They finally marked it down to $35 and I couldn't say sold fast enough!


I polished the hardware (top is before) with Bar Keepers Friend (don't forget to wear gloves!), synthetic steel wool, and wiped on a layer of spray car wax to help protect the finish.


I was considering keeping the natural wood, but the wood was pretty damaged. The drawers were in good condition, but I thought there was two much detail on the front for a two toned finish, so I decided to paint the whole thing.


I sanded it with my orbital sander (80 grit then 120 or 220 grit), wiped it down with a micro fiber cloth and taped off the drawers.


I applied two coats of my favorite primer, Kilz Adhesion (it goes on smoothly, is durable and sands amazingly well) - even though it is formulated to bond to slick surfaces, I like to sand to make it extra durable.

Next up, paint. I'm looking for a medium to medium dark neutral gray with subtle brown undertones. Picking a gray is super tricky, it goes blue, very quickly! When selecting a gray, pick up multiple swatches and compare them in the space that the will be painted (the light makes all the difference!)


Do you have a favorite medium to medium dark neutral gray with brown undertones

3.

This weekend, we worked on building a new desk! I've been wanting a new (large) desk for a while, and we finally got some time to work on one.


The legs are removable - so it fit in the car (perfect since we're constantly moving furniture between TN and MD) Annabelle liked laying on it for a little, I think she liked being up higher so she could see better. She spent the rest of the time on her blanket on the other seat (I think she got tired of the desk bouncing, ha!) Thankfully she enjoys riding in the car since we're in it a lot!!

So that's where we're at, I can't wait to see all of these finished, I love them all already!!

Home Depot Holiday Style Challenge

Our Home Depot Holiday Style Challenge post is live!! Make sure to stop by to see how we decorated for Christmas! 


Here's my favorite blooper from the day :) Normally she hates it when I take pictures, but she was all about being very close that day!!


This end is a little better :)


Even though it's early, I really enjoyed getting a head start on the season (it's definitely my favorite holiday!) Also, make sure to follow along on Home Depot's blog, The Apron, all month for lots of great Holiday ideas! 
Powered by Blogger.