Kirkland's Decor The Halls | Holiday Table Vignette + Giveaway

The holidays are right around the corner and we're slowly making progress to make our home entertaining ready! Thanks to Kirkland's and the Decor The Halls campaign for giving me the push to get started!

The Decor The Halls event included a mystery box of items that were sent to 4 different bloggers to create a vignette around their home.


First, to give you an idea of what we started with (and how far we've come!) here's a photo of our dining room when we moved in (dining room is area in with the post wall in the back of the photo).

BEFORE


Our home is a passive solar house, so the majority of the windows are positioned on the southern side of the house (for maximum sun exposure). Our dining room (northern exposure) has zero windows and was in desperate need of light! Adding large mirrors is the perfect way to reflect the windows from the southern facing wall and instantly make the space bright and airy!


When I peaked inside the mystery box, I was excited to find, 2 clear glass lanterns, a large clear glass lantern with rope, and a chalkboard easel. To complete my space, I selected the Golden Bamboo Framed Mirrors - they were SO perfect for the space - it now looks like we have two giant windows!


The large clear glass lantern with rope is perfect for a tall flower arrangement. White hydrangea, sweet smelling eucalyptus, colorful winter berries, and fresh pine make an easy, low cost arrangement.


We made a few super easy abstracted trees to complete the space (tutorial coming soon!)


Fresh pine from around the yard is a perfect, low cost holiday decoration!


I'm loving the bright addition to our home!


Make sure to stop by the other bloggers to see the mystery box items in their homes!

Infarrantly Creative

Our Fifth House

The Wood Grain Cottage 
Want to know the best part? Kirkland's is also offering a $150 giveaway to one lucky reader!! Enter on the widget below!

a Rafflecopter giveaway

I received compensation for the "Decor The Halls" blog post. Kirkland's partnered with several bloggers like me to raise brand awareness. All purchases and content are on my own accord and reflect my personal opinion and style. Kirkland's blogger outreach policies abide by the WOMMA Ethics code, FTC guidelines and social media engagement recommendations. For official Kirkland's giveaway rules visit here

DIY Wood Slice Wreath | Tutorial

Did you notice the wood slice wreath in our Home Depot Holiday Style Challenge? Today, I'm sharing the tutorial! It's fairly easy and can be done in just a few hours! Read on to see how we did it.


To get started, you will need:

- Wood branches (dried out - let them sit in the garage, uncovered for a few months, various widths, from about 3" to finger width)
- Chop saw and Jig saw
- Thin wood rings, 12" in diameter (we cut ours out of 1/4" luan plywood)
- Black matte spray paint
- Liquid Nails adhesive
- Ribbon, fabric, Christmas balls (any other decorations you'd like to include)

First, on our chop saw, we clamped a piece of pine to the right of our chop saw to set the width of the wood slices. To get slices that were the same thickness, we just slide the branch till it hit the pine and then cut. A super easy and quick way to get slices that are the same thickness.

Remove any side branches before starting and hold the wood tightly against the back and bottom of the chop saw, this will give you maximum control - use extra caution since you are cutting something round and irregular instead of square - it is more likely to fly! Always keep a safe distance from the blade and stop cutting the branch once it is too short and you can no longer hold it safely. Remember to always wear eye and ear protection!!


To cut our rings for the backing, we used a pencil and string. Holding the string at the center of our circle, we drew a 12" circle (2" thick) (so the string was 6" for the outer line and 4" for the inner line). Then we cut the shape out with a jigsaw.


We spray painted the fronts matte black (so that the gaps between the wood would be less noticeable). Once dry, the wood rings were randomly attached with liquid nails adhesive. Since the adhesive doesn't dry clear, try not to use too much so it doesn't seep out the sides.


Once the adhesive has dried (about 24 hours),  connect the rings with loops of fabric or ribbon. We used a large black and white buffalo check fabric from Ikea (we also include a thin strip of poster board  inside the fabric (stapled to the back of the wreath) to help support the weight). We finished off each wreath with a simple bow and cluster of Christmas balls. Super easy!


I hope you'll give it a try!


Carved stool tutorial here
I'll be back a little later to share a few more Christmas decorating (and DIY gift) ideas!!

P.S. the winner of last week's giveaway has been announced!! Did you win? Click here to find out! Also, I'm SO excited that Everything But The House is coming to D.C., check out this article to see if they are coming your way!

Home Depot Holiday Style Challenge

Our Home Depot Holiday Style Challenge post is live!! Make sure to stop by to see how we decorated for Christmas! 


Here's my favorite blooper from the day :) Normally she hates it when I take pictures, but she was all about being very close that day!!


This end is a little better :)


Even though it's early, I really enjoyed getting a head start on the season (it's definitely my favorite holiday!) Also, make sure to follow along on Home Depot's blog, The Apron, all month for lots of great Holiday ideas! 

Simple Gift Wrap Idea

Hi! Today I'm at Jamie's blog, C.R.A.F.T sharing a simple gift wrap idea. Stop by and check it out!


Don't you just LOVE that pom pom yarn? I found it at Ollie's! Thanks so much to Brittany for the polka dot inspiration!!

Tomorrow I have an awesome project featuring Krylon's Looking Glass spray paint. You won't want to miss it!! Make sure to stop by tomorrow!

Blogger Stylin' Home Tours Christmas 2013

I'm so excited to be participating in Lindsay of The White Buffalo Styling Co. Christmas home tour! There are so many amazing bloggers participating - I'm so honored to be included!

This weekend we started decorating for Christmas (I know we're late :) We've been traveling a lot so we finally got a full weekend to work on projects. Yay!

For our Christmas tree this year, I decided to focus on texture, contrast and shine. As always, it's mostly DIY!


I made a feather garland by gluing loose feathers to yarn. I love the softness that it adds!


I finally made my first gold urchin (took me long enough :) using styrofoam balls, toothpicks, and gold spray paint.


I printed a few letters and then cut them out of chip board and spray painted.


I glued black and white paper clips on the back to attach them to the tree. Finally, a few pennant banners made from gold glitter ribbon and contact paper that I drew a diagonal stripe on.


I collected a few pine cones and branches from the yard. I miss California's weather, but it's nice to actually feel like Christmas here!


I found this brass pillar candle holder from Goodwill for $1.30 (LOVE thrifting here!!)


I simply placed one of the urchins on top of the tree as a topper - it just stays in place :) Thanks Bethany for the inspiration!! The tree skirt is a striped tablecloth that I folded up. It definitely feels more Christmasy here .. now we just need snow!   


Make sure to follow along with the entire Christmas home tour - all of the bloggers participating are amazing - you won't want to miss any!! 


Monday:

Roeshel - DIY Showoff 
Jess and Monica - East Coast Creative
Laura - Finding Home 
Sarah - Sarah M. Dorsey 
Angela - Number Fifty-Three 
Gwen - The Makerista 
Brittany - Brittany Makes 

Tuesday:


Wednesday:

Jamie - C.R.A.F.T. 
Lucy - Craftberry Bush 
Michelle - Decor and the Dog 
Whitney - The Curtis Casa 
Kristin - Bliss at Home 
Summer - Simple Stylings 
 Kelly - View Along the Way 


Thursday:

Jenna - SAS Interiors
Chris - Just a Girl 
Michelle - Iron and Twine 
Amanda - Our Humble Abode 
Julia - Cuckoo 4 Design 
Lindsay - Makely Home
Jennifer - Dimples and Tangles 

Friday:

Traci - Beneath My Heart 
Kristin - Hunted Interior 
Eileen - A Creative Day 
Gabbi - Retro Ranch Reno 
Kristen - KFD Designs 
Jessica - Dear Emmeline  
Sarah - Royal Marigold 
Carmel - Our Fifth House 


DIY Christmas Project at A Creative Day + Holiday Mantel Tips at Pottery Barn

Hi :) Today I'm at A Creative Day blog sharing my first wood project!


Make sure to stop by and check it out! And make sure to follow along with the entire DIY Christmas series!

Also, in case you missed it, Monday I shared a few holiday mantel decorating tips at Pottery Barn's blog - take a look :)


Christmas Wreath: Rolled Fabric Flowers and Evergreens


Yesterday I worked on our Christmas wreath, I think it needs a simple bow - so while I decide, here is a sneak peak.

I used the same tutorial for the rolled fabric flowers as seen on the Christmas tree


I then glued them to a floral wreath that was cut in half (the other half was used for our fall wreath) and stapled some local evergreens to cover the rest of the wreath.

I used about 2 yards of fabric for the flowers, so total cost of new supplies was only $4! I'll be back next week with finished photos.

I'm also excited to share my next DIY Christmas gift, it is super simple and I love it (hopefully you will too!) Stay tuned!

--

Don't forget to enter for a chance to win {4} 8.5x11 prints from my etsy shop!

Our Christmas Tree


This weekend I finished decorating the tree (well almost - I still want to make a tree skirt). This year I decided to go with a silver, gold and white tree. If you follow my Pinterest boards, especially my holiday board, you probably had a clue as too what was going on our tree :)


I found this gold ribbon on clearance last year after Christmas at Joanns for 70-90% off, I'm not sure. Either way it was a good deal! 

I bought a few clear glass bulbs from Michaels and paint pens from Wal-Mart and drew a loose scallop design. I left some clear.


 and I added paint to the inside of some.


I was originally going to make the medallion ribbon ornament, but my ribbon wasn't wide enough. I tried it with a torn piece of white broadcloth, but wasn't easy to manipulate so I decided to use the one I made as a topper.

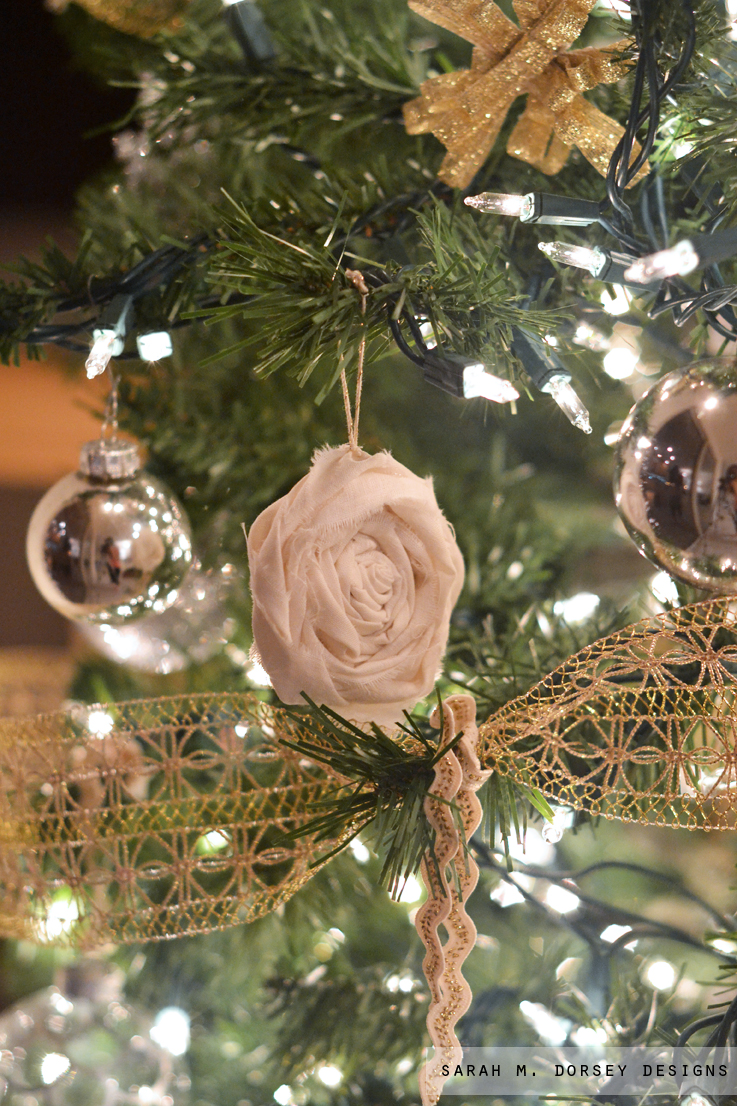
I used the rest of white cotton broadcloth to make folded flowers, using this tutorial. 
I followed it except,  I didn't keep the fabric folded at 1/2" the whole time (just at the beginning) and then I twisted and folded the entire 1" strip, I found it easier and faster this way. 


They are hung with crochet thread, I found white/gold at Wal-Mart for $2.97.


I used white and silver snowflakes that I purchased last year from Target and made glitter ornaments with clear glass bulbs, spray adhesive and glitter. Glitter is a must for Christmas, right? It looks so pretty with the tree lights!


I sprayed the inside of the bulb with spray adhesive, getting as close to the top as possible, it kinda floats to the top too (enough for the glitter to stick).


Then added glitter and shook. and successfully glittered my hand too, it did come off easily though :)


I painted a few silver bulbs that I had (bottom middle of photo) with the gold metallic paint pen too.


I'm currently using a white blanket for the tree skirt, but hope I have time to make one!

We have lots of projects in the works, come back tomorrow for another DIY Christmas gift and later this week for more Christmas decorations and project updates!

 
thriftydecorchick.com
 
Powered by Blogger.