Goodwill Finds

Want to know what my favorite part of Ohio is so far? My local Goodwill!! In California, I would find something pretty good every few months. And everything below? Amazing finds in only 1 week!!

First up this side chair for $9.99. I almost walked away from it because I thought that it would be too hard to reupholster. My Instagram friends thought the price was too good to pass up, even if it didn't work out - so I went for it. I'm thinking to replace the back channeling with tufting - I'd probably need a special sewing machine to duplicate it. LOVE the front legs!!


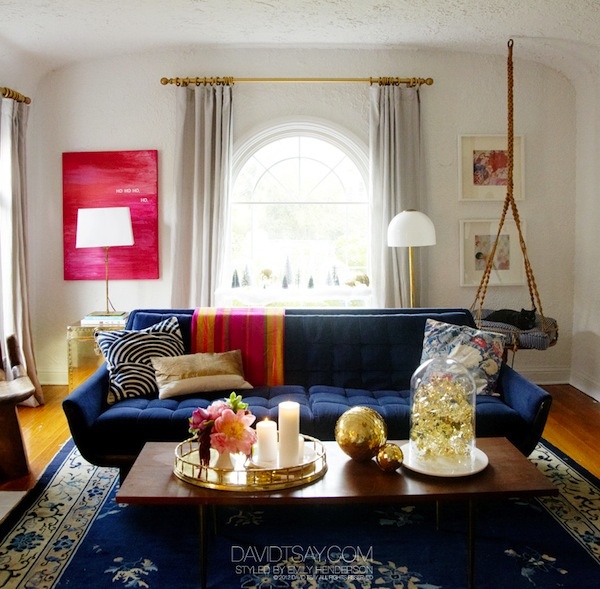
This coffee table is pretty big, 30" W x 50" L. We've already started working on it - I love how it's coming together! Stay tuned.

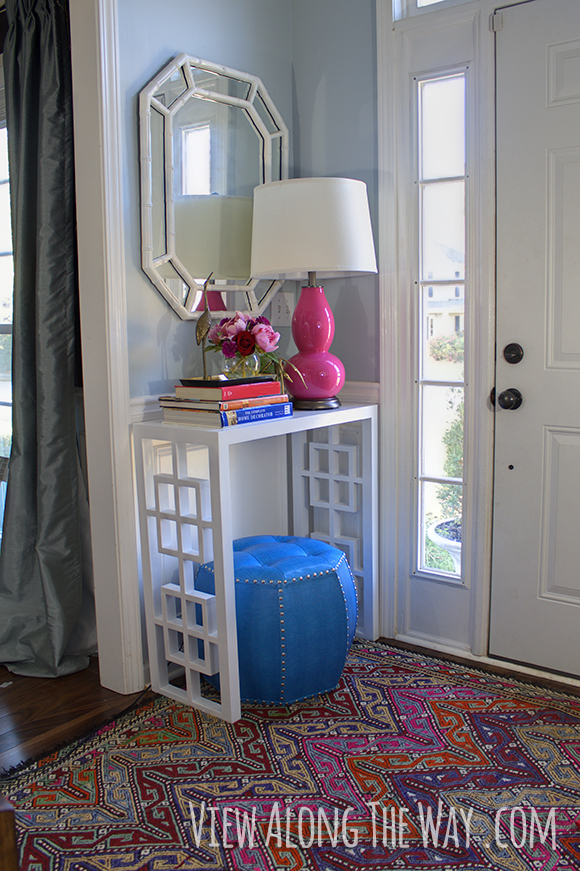
 How about this mid - century modern floor lamp!? Amazing, right? The finish is a little worn, so it will need something. Or this large french provincial mirror, love it! The frame is plastic, but still worth it. I can't  believe this little octagon frame was only .99! Finally, this little silver bowl. I think I could use it pretty much anywhere!


All of this for just over $35! Pretty good, right? Thoughts? What would you do with some of my finds?

p.s. we made two trips one in our little volvo and one in our little mini .. but everything fit, barely .. David's been looking at trucks online recently, so maybe we'll have a thrifting friendly vehicle soon! Plus with all the rain we've been getting, looks like it might be a snowy winter ... so a truck would be good!

Gold Pharmacist Lamp + My new favorite gold spray paint

Hi everyone! Happy Wednesday! I'm not going to lie ... October has been a little rough on us, don't get me wrong, we are very blessed and thankful that we're all healthy and have a roof over our heads, but being in transition is tough. Having your home - your "safe haven", where you have everything and know where everything is, etc. helps you feel like you can take on anything the world can throw at you.

We're still in a (furnished) unit (with all of our belongings (in boxes), including our furniture) waiting for ours to be finished ... we'll be moving in in a week or so ... or we'll be looking elsewhere. Needless to say, it's really tight in here - especially since this place is smaller than our last. We'll be moving some things into a storage unit, once we unpack and see what we really need for the next few months.

Just wanted to share since I haven't been commenting (on other blogs) or responding to comments here as much as I have been. So a HUGE thank you for sticking with me while we get things sorted out!  You all are the best :)

We may have limited space, but that hasn't stopped us from working on projects!!

A week or so ago, I picked up this little lamp at Home Goods. I haven't been near a Home Goods since we lived in Tennessee, so I was beyond excited to be back!! I picked up a yellow console table and this black and silver lamp. Great shape, but why it's two colors .. I'm not sure .. something that small should be just one color, just saying :)

But it had great lines and was only $30. I haven't found one under $80, so I was sold!

First, I sanded it with a fine sanding block, wiped it off, and taped the cord and and where the light bulb goes.

I then primed with my favorite bonding primer - Zinsser Cover Stain, it sticks really well, and once dry has a thick durable coat.


I picked up Brittany Makes favorite gold spray paint at Blick Art Supply when we drove through Chicago. It's a professional artist spray paint, but formulated to stick to almost everything.

Brittany's recommendation definitely didn't fall short! It adhered and covered well, the color was perfect - not too yellow/green and not too rosy, just in the middle, but definitely on the warmer side. This is my go to gold now!

On a funny side note, I was holding the paint can in my legs as I bent down I hit the nozzle against my stomach and the paint went straight through my shirt .. it did come off .. eventually :)


I did one light coat and then a second.


I LOVE how it turned out! Definitely worth a little extra money for the spray paint! It's about $8 vs $4.


I just love it - it makes me smile :)

Did you catch the little sneak peak of our new project? Check back soon for details, but the tutorial will be on Houzz shortly!

Q+A | Kristin Bliss at Home


Today's the last day of the Q+As - hopefully you found a few more blogs to follow or learned a little more about your favorite bloggers!! Last, but definitely not least, I have the fabulous Kristin from Bliss at Home! Kristin has so many great rooms in her house, but I think my favorite is her entryway - those horizontal stripes, gold sconces, and grid of frames really make the space! I also love that her house is primarily black, white and neutral with pops of colors ... sound weird coming from me? I might be going a little more neutral this time around. MAYBE, we will see - I have lots of ideas in my head :) 

Kristin makes black, white, neutral and pops of color look SO good!!

Here's a little more about Kristin. 


I can't help myself but I love the PSL. Hold the whipped cream and get it with non-fat milk and it is still delicious!! It's pretty much fall in a cup.


My fave fall food is a plate of sliced honey crisp apples with a little warm caramel drizzled over them.


I love to bring the outdoors in. Whatever is from the yard or in season. Flowers, branches, fruit, rocks...anything goes. It can make me smile just seeing some flowers in a vase. If it is a rock my kids picked up from the hiking trail it finds a place on a bookshelf and those become happy little memory triggers.

This image is from our Modern + Fresh Fall Home Tour. The branches are from our yard and the pumpkins bring in the seasonal touch.


The first time we did our kitchen cabinets. I groan just thinking about it! We used a new product and it didn't deliver as it had boasted...so we had to sand them down and start all over...sometimes it just pays to do it the tried and true way and not try something because it claims to save you a step or is supposed to be faster.

I've also learned to have patience when I'm making over furniture. I've walked away from a project when I'm not feeling it. I love doing it, but I have to be in the right frame of mind to do it right. If I'm not feeling it, I walk away and wait a day or two and take my time. I wait until I find it enjoyable again.


My hands down favorite project is our library wall. It was something we all worked on together and we all enjoy it now. 


I also love the black+white abrstract art I made with my boys. I actually had someone email me asking to buy it believe it or not! I had to say no of course, because my precious little people helped me make it and it is something we all love. 


Plaid has always been a fave of mine--especially this time of year. I just added some plaid euro shams to our bed that I made out of stadium blankets and they just add the right amount of color and pattern to our room.


There are so many!! I could give you a list 50 designers long!! I adore Celerie Kemble, Kelly Wearstler, Mary McDonald, Jonathan Adler, Emily Henderson...just to name a few.

--

Love Kristin!! How great is her library wall!? If I didn't know, I would have never guessed that it is made from Ikea bookcases, it looks like custom built-ins!!! It's SO good! 

Also, I completely agree on Krisitin's DIYing advice - if I'm tired and getting frustrated, I walk away and come back when I'm feeling more refreshed. I make less mistakes and it turns out better in the end :)  

Thanks so much for sharing Kristin!! 

If you're new to Kristin's blog, make sure to check out her projects page and home tour!

Missed some of the Q+As? Click HERE to see them all!

Q+A | Kelly View Along the Way

There just are a few more Q+As and I have a real treat for you! Kelly from View Along the Way is funny, super sweet and SUPER talented! She is the DIY queen - find endless inspiration here. Also, I love her style - it feels comfortable and live able, but really pulled together. She was recently published in BHG for her AMAZING laundry room. With a stunning room like that - I think that I'd want to do laundry every day :)  


Here's Kelly


Mix pumpkin and chocolate together in any form, and I will eat EVERY LAST BITE before you can even taste it, cookie-monster-style. I'm sorry. I can't help it. I hope we can still be friends. (P.S.: Here's the recipe for my favorite *healthy* pumpkin chocolate chip muffins. YUMMM.)


Pillows! Pillows with fun textures and patterns! Switch out your pillows for something different and you'll feel like you're living in a whole new place. That's why I say you can never own too many pillows. My husband would say you can never throw enough pillows OFF the couch and onto the floor, but don't listen to him. More info on Kelly's living room here.


I hate to brag, but I am the queen of DIY fails. :) Like this attempt at butt-stamp painting. (Yep. It was as ridiculous as it sounds.) Or this attempt at angled painted stripes. (It was going to be SO GOOD in my head.) My big lesson is this: if you're not creating DIY fails, you're just not doing enough projects. I like to have a good laugh at myself and then post about what I did anyway. If nothing else, you can at least learn what doesn't work. (What doesn't work: toddler heinies as art. Trust.)

We're in the middle of redoing our foyer, so we just got a new rug, turned a $3 headboard into a Hollywood Regency-style bench...


and built this little DIY fretwork console table.


I'm excited for this redo because I'm really branching out and using color in a way that I never have before. It's scary but freeing to decide to decorate for what YOU love instead of what you think your friends or neighbors would like. (Here are my six decorating rules to live by.)


 I have a THING for navy velvet. I don't know what it is: I just want to wrap my face in it.


Source: Designed by Sara Gilbane Interiors via Lonny Magazine

And I've never met a kilim I didn't like.


 Jonathan Adler. Nate Berkus. Miles Redd. Amber Interior Design. Jenny Komenda.

 *THANKS so much for letting me crash your beautiful blog for a day, Sarah!*

--

How great is Kelly!!? I've loved following her recent foyer posts - that headboard turned bench is pure genius! It looks like it's always been a bench, which is always the best kinda DIY!

Thanks so much for stopping by today Kelly!

If you're new to Kelly's blog, make sure to check out her home tour and projects page - you'll find endless inspiration!!

Knocktoberfest | Tripod Floor Lamp

When Lindsay from Makely School for Girls invited me to participate in her blog hop, Knocktoberfest, I instantly said yes!! It's a blog hop between 29 amazing bloggers featuring budget friendly, knock off projects inspired by high end items! There have been some AMAZING projects, make sure to check them all out here!

If you're coming over from Laura - Finding Home, welcome! If not, make sure to pop over and check out her fabulous project LOVE it!!

We recently moved and are getting settled, but we managed to find a few tools and pull together a fun lamp inspired by Design Within Reach's Tripod Floor Lamp.


We haven't unpacked all of our tools yet, but we found just enough to make a lamp.


2x4 - cut to a circle and holes were drilled to hold the legs / 1/2" copper plumbing pipe - 1 10' piece cut into three even sections / we didn't need everything in a lamp kit so we sourced our items separately - a nut, wire with plug, socket, and a threaded nipple. / black spray paint to paint the 2x4 and the wire / lampshade

I missed a few photos, but I'll try to explain along the way, feel free to ask if I miss anything :)

Here's how we did it!

We created a template to mark where the holes would be drilled and then held a template to mark the angle of the drill (removed once we started drilling). Since this wasn't precise, we had to go through three variations until we had one that was even. Not the best way to go about it, but worked with our limited tools :)

Click HERE to download a template of our hole placement and the template for the angle (we cut the pieces out and taped the hole placement to the wood and held the angle up prior to drilling and then removed once we started drilling.) There are multiple copies on the page in case you need extra, they are all the same. Print on 8.5x11 paper.

** the pipe measures 1/2" INSIDE, 5/8" on the outside - yep forgot to measure - we had to make a trip back to get the 5/8" bit since we needed it to be precise.


We cut a notch in the middle for the socket to sit in.

Next, using a cup, we marked a circle around our holes, cut it out with a jigsaw, and sanded down it down with an electric sander.


We drilled holes in one of the copper legs for the wire to fit in. Next, we threaded the wire through one of the legs and wired the socket.


I then taped the legs and socket and painted the mounting piece (would've been easier before assembling :)


While the paint dried, I polished the copper legs. I liked the color as is, but wanted to remove the red text. I rubbed it with ketchup and let it sit for about 30 minutes (note, make sure that it is out of reach of pets, kids, etc. - annabelle, our puppy, got a taste) I then used a combo of cleaner (to remove the ketchup residue some of the text came off too) and then nail polish remover to erase the red print.


We reassembled and then turned it on - it worked!


The cord runs through a leg and out a hole drilled on the bottom. We also used copper end caps to finish off the leg.


This is actually our first floor lamp - I love the height that it adds!


After getting the supplies, we finished the lamp in one evening and spent about $34.50.

Cost breakdown:

1 - 10' copper pipe cut in three even sections - $10 (Home Depot)
3- Copper end caps, .50 each - $1.50 (Home Depot)
Wire - $2 (Home Depot)
Additional lamp parts - $3 (Home Depot)
Lamp shade $ 18 (Target)
2x4 section (Scrap pile at Home Depot)

$16.50 for base + lamp shade $18 = $34.50, sure beats the nearly $400 price tag at DWR!


I'm up last for the tour - so make sure to head back to Lindsay's Makely School for Girls to catch any of the projects that you might have missed!!

or catch up here!

Monday, October 21
1.  Lindsay - Makely School for Girls
2.  Beth - Home Stories A to Z
4.  Beckie - Infarrantly Creative
5.  Emily - Decorchick!
6.  Wendy - The Shabby Nest

Tuesday, October 22
1.  Donna - Funky Junk Interiors
2.  Jess and Monica - East Coast Creative
3.  Jackie - Teal and Lime
5.  Carmel - Our Fifth House

Wednesday, October 23
1.  Chris - Just a Girl
3.  Melissa - The Inspired Room
4.  Ana - Ana White
5.  Marianne - Songbird
6.  Karianne - Thistlewood Farms

Thursday, October 24
1.  Roeshel - DIY Showoff
2.  Sandra - Sawdust Girl
3.  Jamie - C.R.A.F.T.
4.  Cassity - Remodelaholic
5.  Melissa - 320 Sycamore

Friday, October 25
1.  Ashley - The Handmade Home
2.  Stacy - Not JUST a Housewife
3.  Traci - Beneath My Heart
4.  Brooke - All Things Thrifty
5.  Laura - Finding Home

Q+A | Lindsay The White Buffalo Styling Co.

Today I have the fabulous Lindsay from The White Buffalo Styling Co. answering a little Q+A! Yay!! Lindsay has an incredible sense of style - it's effortless and natural yet composed and just works SO well!! She also is the queen of yard sale finds, check out this amazing $5 kilim rug that she found! I think we need to go thrifting together :) 

Here's Lindsay! 

--


Sarah, thank you so much for having me over today! Y'all, Sarah is so awesome. Of course you know that because you come and visit her every day, but seriously, I love her blog and style. I'm so glad to be here!


It's really hard for me to nail down one food or drink. I adore the spicy, cinnamon, and pumpkin flavors of fall. On most nights during this season, I can be found with a good cup of apple cider in hand and I've been known to add a can of pumpkin to just about everything!


My favorite way to freshen up a room is adding something unexpected or unique. Just like the reason behind my brand name, I love finding the "white buffalo" element in every room. That's something rare, not seen before, or something that just has a story. When designing, I like to start with this and then build the room around it. But, that really is the best way to freshen a room later on too! Find or create one unexpected item that will make people go, "What's that?" or "Where in the world did you find that?" I love a good conversation starter!

My favorite DIY project falls into this "white buffalo" category. I loved West Elm's accordion sconce and really wanted them for our bedroom. As a habitual DIYer, I couldn't justify the $180 price tag and really thought we could make one ourselves. We took the Frack mirror from IKEA (4.99!), a lamp kit from Home Depot, and a shade, and DIYed our little hearts out! You can read more about this project here.
West-Elm-Accordian-Light-Fixture1

Now, I just have to finish the rest of the master bedroom to go with it!


Y'all, I have so many DIY fails. You have to take risks to end up with the good stuff and risks can also mean failure.

The one that's coming to mind is my most recent. Over the weekend, I was preparing our house for an upcoming fall tour and I had the idea to cover a frame with plaid fabric using double-sided tape. That should totally work, right?

Well, one hour and lots of frustration later, the frame wasn't done, looked horrible, and really couldn't be salvaged.

Once, I gave up, I knew how to tweak the project to get it just right, but after an hour, I didn't have any time left for this one.

Every time I fail at a DIY, I learn how to do it differently and hopefully more successfully the second time. More than that, though, I learn that taking risks is essential in good design. Sometimes you'll fail, but other times, some rare, white buffalo magic will be made.


We have been renovating a house for the last seven months and have just gotten to the decorating phase that I love. I am loving having spots in our house to FINALLY style! One of the first areas that we tackled was the kitchen. I've dreamed of a white kitchen with open shelving that could be re-styled at my every whim for years.

The White Buffalo Kitchen

Designing and styling these shelves is still one of my favorites. I chose to keep the shelves themselves fairly modern, layered them over white bead board, and then styled them with a mix of rustic, modern, and pretty touches. They're a really good mix of my eclectic style, I think.

Speaking of my eclectic style, my favorite room in our house is currently our lounge. My readers helped me re-name it recently because I was dumb and was calling it "the front room." "The Lounge" was the winner. I love it!

The White Buffalo Lounge

It's my favorite room because even though it's not finished yet, it has a really good mix of all the things I love. Navajo rug, antlers, mid-century modern chair, cozy handknitted afghan, and plants.


I am in love with all things tribal, kilim, and navajo. Every single room in our house now has a rug that fits this trend.

Our dining room has a black navajo beauty that I found clearanced for $25.

Bohemian Modern dining room

The lounge has that red navajo rug that I basically stole.

The Lounge navajo rug

The kitchen kilim is still my favorite. eBay has great rugs!

-Kitchen-Kilim-Rug

And then, as if all of the rugs weren't enough, I've been stocking up on kilim pillows. I made this pile from $2 rag rugs.

KILIM

I just love the punch of color and pattern that it adds. Some of these rugs are old, some are new, but for some reason, this pattern makes me feel like the objects have a soul and story. Whether or not this trend stays popular, I think these patterned beauties will be hanging around my house for quite a while!


There are so many amazing designers that I love, but I just have to give it up for Miss Emily Henderson.

Emily-Henderson-Blue-Sofa 

So much of my eclectic style is inspired by her. I love how she mixes different colors, patterns, and textures in a no rules sort of way. 

Thanks so much for having me, Sarah! I loved stopping by :)

--

ooh how gorgeous is Lindsay's West Elm accordion lamp hack!? I love West Elm, but I prefer Lindsay's version! That would be perfect for our current bedroom since it is so tight!! 

Her kitchen is also stunning!! LOVE the open shelving and mixed metals! and that rug is fabulous!! I want :) 

Thanks so much Lindsay, such a pleasure having you today!! 

If you're new to Lindsay's blog, make sure to check out her home tour and tutorials page
Powered by Blogger.