Project Time!

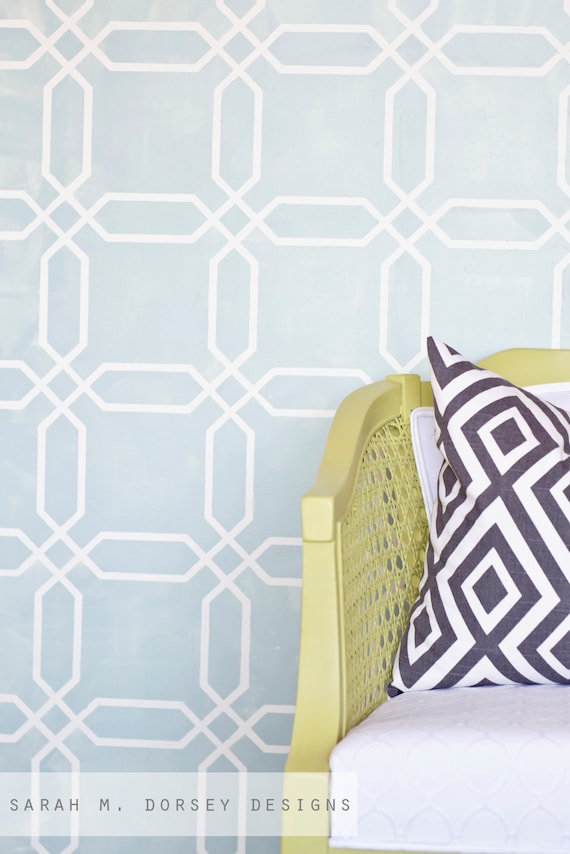
Yesterday I started a new project! I purchased this Target panel a few months ago right when it came out and finally found the perfect use for it, this.


I'm in project mode right now, because there are a lot of unfinished projects that I want to get done within the next month or so (before we move later this summer). So posts may be shorter, and maybe a little fewer, but hopefully I'll have lots of projects to show you soon!

Stay tuned!


Herringbone Driftwood Table

Over the long weekend, we finally had time to finish our new coffee table. This has been one of our most time consuming projects, so it feels great to be done!


I'll give a full tutorial for how we got this look, but if you'd like to make something similar without milling your own wood, I'd recommend looking for thin strips of wood with the width already cut. This would definitely cut down the time significantly!

We started this project with a large pile of driftwood that we collected on a local beach (That's David on the left).


Once we decided on a pattern (with a little help for you all!), we calculated the number of pieces we would need and started cutting. We needed around 300 4"x1"x.25" pieces to make the top surface. WOW, that's a lot! At this point we were re-thinking the project, but we had already started cutting and loved how it looked inside, so we decided to keep going.

Our table measures:

36.5" L x 28.5" W x 15.5" H


Here's the time consuming part, milling our own wood ...

First David cut the driftwood into ~5" sections. To prepare the wood for the table saw, he cut larger pieces in half and cut one side so the board could sit flush on the table saw fence. For smaller pieces, he just trimmed off a round edge, laid it flat on the saw and cut another round edge to create the square side for the table saw.


Next, David setup the table saw for the .25" thickness  and ripped all of the 5" sections into the strips. Whenever getting near the blade like this, always use a push stick to keep your hands clear! Now we had strips of wood that were about ~5" and smooth on three sides.

~300 pieces ready for the final cuts


Next, we setup the saw to cut all of the little pieces down to 1" wide. While David ripped the pieces to the 1" width, I cut the the edges with the chop saw to bring them down to the 4" length. We measured and secured a 2x2 piece of wood at 4" so we didn't have to measure every time.

Whew, that was a lot of cutting but I was so happy with the variety in all of the pieces, it was definitely motivation to keep cutting!


For the tabletop, we used 5/8" MDF from Ace (we purchased a half sheet). We also got them to cut it to size since it was free. We measured and drew the pattern for the center row. Setting up the first row so it was straight is important because that will determine how straight the rest of the pattern is. I had a 4x4 square that worked perfectly to make sure that it was straight. We then used wood glue to attach them to the MDF.

For the edges we decided to custom cut the edge pieces so that it would be as straight as possible. I held in place and marked the cut with a pencil while David cut with the chop saw. I did a little by myself when David wasn't home which worked fine, but it is definitely easier with two people.

After gluing in place, we moved onto the frame. 

David ripped a 1.5" piece of poplar hobby board down to 1". We cut the corners at a 45 with the miter saw to frame it like a picture frame, attached it with wood glue and then used clamps to hold it in place while it dried. 

We then lightly sanded the top with 220 grit sandpaper to remove any splinters or sharp edges.

Next, the base ...  

We wanted something simple and thin to complement but not take away from the top, and thought metal would be perfect!

We picked up a few 1" angle steel pieces from Home Depot. It had a coating that was flaking off (we now think it is a galvanized coating), so we figured it wouldn't be hard to remove ... Well sanding didn't take care of it. Chemical strippers didn't do anything either ... really?? I then remembered that white vinegar can do some amazing things. After doing a little research, it seemed that it might be perfect! We built a little container to let them soak (online said about 24 hours). We waited about 16 hours and most of it wiped off with a paper towel. We also used a scotch brite pad to sand off the tougher spots but I think it would of all come off with the paper towel if we let it sit longer. 

We rinsed off with water and dried throughly with a paper towel quickly to avoid rusting. We then sealed the separate pieces with polyurethane, but you could also spray once the frame is put together. 

To build the frame we measured and cut (with a metal jigsaw blade, like this one) the steel to size (14.5" long angle steel x4, 3' straight steel x2, 27.5" straight steel x2). You have to cut slowly and take breaks otherwise your blade will overheat and break (luckily we had three :)

Then we drilled holes through the steel. We used a small drill bit first and then a larger one so that the hole was big enough to fit a bolt. With metal, it is best to drill slowly and press firmly (although we did break several bits ...) 

We also soaked a few bolts in the vinegar (and sealed with poly) so that they would match the steel frame. We then used angle brackets to attach the legs to the top.

After a little trial and error with removing the coating and breaking some jigsaw blades and drill bits, we had a frame! 

We sealed the metal with a few coats of spray satin polyurethane and the wood with 3 coats of matte polyurethane.  


And then we were done, finally! :) This was definitely one of our most time consuming projects, but I am in LOVE with the custom look! 


I love how open it is on the bottom! Annabelle does too, since there is plenty of room to lay underneath.


Peonies are my absolute favorite flower (this actually looks a lot like my wedding bouquet). The little hydrangea came from my plant which just started to bloom again, love the color!


A few close-ups.


Annabelle in her usual sleeping spot :)


Maybe a lucite tray so I don't have to cover up any of our hard work?

Total Time (too much to count, but here's an estimate :)

Cut down driftwood ~ 8 hours (broken up with several breaks, fatigue around saws = not good!)
Lay out pattern and secure strips of wood ~ 4 hours
Finish edge of tabletop (mark where strips meet edge and cut, add poplar frame edge) ~3 hours
Cut and assemble steel frame ~2 hours
Apply polyurethane ~1 hour (plus drying time)

To significantly reduce time, buy pre-cut wood such as thin poplar/oak hobby board (I wouldn't recommend paint sticks since they shrink and curl as they age)

Also, I didn't mention it throughout, but always use your safety glasses, hearing protection, respirator and gloves where needed (which is a lot with this project!) 

Total Cost:

Half sheet 5/8" MDF: $7 (Ace)
1" Angle steel 6' long -  $12.00 (Home Depot)
1" straight steel 6' long-  $8.00 x2 (Home Depot)
Polyurethane: $11 (spray already owned) (Home Depot)

Total: $46

Definitely a time consuming project, but I love the end result!


TDC Before and After

Home Stories A2Z

New Stencil in my Etsy Shop

I recently added a new stencil to my Etsy shop.


Feel free to stop by and take a look!

I'm always looking for new designs, let me know if you have something in mind! :)

Hope you have a great long weekend!!

DIY Rug Ideas for the Living Room

Hi! Just wanted to stop in quickly to share with you a few ideas for the living room rug ... making the herringbone coffee table has got me thinking about what will go underneath it.

We'll be painting the other side of our Ikea Moroccan painted rug. There is a lot of pattern going on in the room so I'm thinking a light gray and a large scale simple pattern, so that it doesn't compete with the Zimba inspired draperies and pillows.

I'm most likely leaning towards a stripe, but if you have an opinion, I'd love to hear it! :) 

We are making progress on the table (weeknights are slower than weekends). We'll  be done by this weekend, stop by Monday to see finished pictures!! (or follow me on instagram @sarahmdorseydesigns for sneak peaks) 

Herringbone Table Progress

Over the weekend David named this MEGA PROJECT, and for good reason, we were basically a lumber mill without the correct equipment. It was A LOT of cutting! We'll go into that more when we post a tutorial ... but for now, check out our progress!


Rough pieces of driftwood were cut down to 1x4 pieces of wood to give a variety of color and texture. LOVE!


For the edges, I held a piece up and marked the cut with a pencil and then David cut with the miter saw (so much faster with two people!)


We've finished everything but two edges, then we'll be almost done with the top!


You've probably guessed by now, but it is going to be a coffee table for our living room ... check back for progress!

Weekend in Photos + Project Update

This week we made a last minute plan to go to Disneyland on Friday. We wanted to go before school got out in hopes that it wouldn't be as busy. Turned out that it was grad night, so we were out of luck but we still had a great time!


Saturday we stopped at Ikea (of course). I wasn't really planning on getting anything, but then I remembered a few things that would be good for projects (always happens :)
Sunday we worked on our latest project that I briefly talked about last week. We started cutting driftwood last week and finished this weekend. It was A LOT of cutting!! We are done with the hard part, so hopefully we will have lots of progress/finished pictures a little later this week!

Want to see project sneak peaks? Make sure to find me on instagram @sarahmdorseydesigns

Hope you had a great weekend!!
Short post today, this week has been busy! I should be back to normal next week :)


For now, here is a pic coming back from our drive up the coast last weekend. (yes, it does have to do with our next project!)

Hope you all have a great weekend!

How to Build Custom Shelving for Only $35!


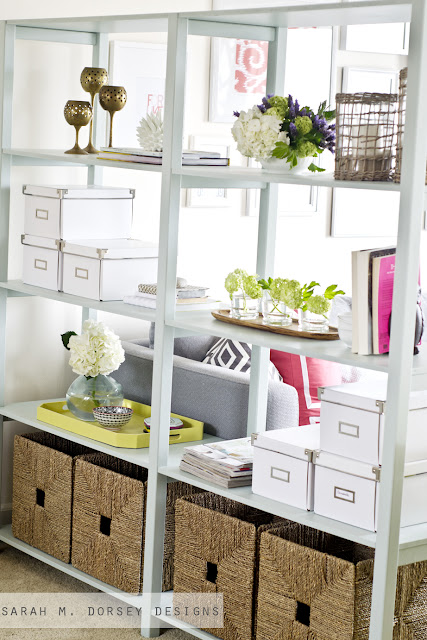
Want to know how we built this shelving unit for $35? Read on to see! 

First a little background info and why we decided to build instead of buy and why we selected the materials that we did ... 

We decided on an open shelving unit for between the office and living room because a. we needed more storage b. we wanted it to feel open, but still have something to divide the spaces

We decided to make our own instead of purchasing Ikea's Vittsjo, because a. the Vittsjo wasn't quite long enough and two was too long b. we are 4 hours from Ikea ... c. it was cheaper by about half

Pretty convincing, huh? :) 

We opted for MDF shelves instead of using 1x12s because we needed it to be about 14" wide to fit our baskets (on bottom shelf) and it ended up saving SO much money! We got two large sheets of MDF at Habitat Restore for only $7! (they aren't always there, but hopefully yours will have some too!) One 1x12x6 starts at about $12 and goes up depending on quality. So we were able to save about $53 on the shelves and get them the width that we wanted! 

We then purchased 2x2x8 (x6) redwood pieces from Ace Hardware for about $4.50 each for the other wood. We could of saved even more money and went with pine, but we wanted it to be a little stronger and they were more finished, which required less sanding! ALWAYS a plus! 

Ok, now here's how we did it: 

The overall height was 5'3" and width was 14.5". The drawing and photos don't really show it, but for the center rods we cut a 2x2 in half with a table saw, this allowed us to save on wood and less wood = sleeker appearance (which we were going for). 

For the two end ladders, the 2x2s (cut in half) were placed on the edge and the center ladder had them centered. 

While building the ladders, it was helpful to have one person hold the pieces in place, while the other attached them. 

Next we moved onto the shelves. We had them cut to 14.5"wide at Ace Hardware (before we got the table saw) when we picked up the 2x2s. We then measured where the 6 notches went (on the ends and centered)

Annabelle visited ... this is how she tells us that she is bored and wants back inside :) Inside she went, and David cut the notches with the jigsaw.

He tested to see if the 2x2 would easily fit inside and then cut off a little more if needed. Since the shelves are pretty tight to get in there (more on that later) we wanted the cuts to be slightly big so that they would fit. 

Now we started assembling. We predrilled holes in the center of the ladder pieces for the shelves to attach to. (This would of been easier before the ladders were assembled). Balancing the three ladders (you need at least two people :) we carefully slide the shelves in at an angle and placed them and then attached them with screws. We did have to cut a few of the notches slightly bigger at this point so that the shelf would fit. 

and then we added braces at the bottom for extra support and to ensure that it is straight. We used a thin piece of poplar hobby board. 

We actually painted the pieces separately prior to assembling since we had to install in place (our stairs are too narrow for it to fit). So paint prior to assembling or after, whichever work best for you! I used Zinsser cover stain oil based primer because it bonds to shiny surfaces like laminate (works great!) and a custom mixed light minty blue for the top coat. 

and that was it! 


Total Cost:

MDF sheets $7 (Habitat Restore)
2x2x8 Redwood $4.50 x6 (Ace Hardware)
Paint (already owned) 
Primer $8

Total Cost for wood $34
plus primer = $42

I still can't believe that we got all of the wood for about $35!! Make sure to keep your eye's peeled at Habitat Restore or other similar stores to cheap building supplies, it can save SO much money! 
Powered by Blogger.