DIY Striped Painted Trunk | Tutorial

Hey! I hope you're having a great Tuesday!! I'm in full on planning mode for #projectentry, pulling together all of the details. We CAN'T wait to finish it up!

Today I'm sharing a bold painted trunk, originally posted on Infarrantly Creative, if you missed it there, read on!

A few weeks ago, I found a beaten up trunk at a thrift store for only $7. Yes, $7! I love thrifting! Once cleaned up, it was better, but it still needed a wow! Inspired by the an issue of HGTV magazine, I created a bright, modern take on an old trunk.


First, I cleaned it up. Mine had stickers on it so I used Goo Gone and a Brillo pad. Then I wiped it down with a little white vinegar and water.


Now it was ready for paint. My trunk had a plastic finish, so I used a Kilz Adhesion Bonding Primer since it's formulated to stick to glossy surfaces. The consistency is perfect straight out of the can (not too thin and not too thick), it also resists brush strokes, and it adheres super well! (I also used here on a laminate dresser)

I was sent this to test out from Kilz, but I wasn't compensated for a review, all opinions are all mine.


I brushed over the entire trunk with the latches open, so the lid was cracked. This prevents the paint from closing it shut.


I was originally going to do a white and gray stripe, but I wanted something different - something bold. Inspired by my new favorite Lula & Georgia rug, I painted it with an orange and coral stripe.

First, I gave it a coat of Annie Sloan Chalk Paint in Barcelona Orange.


Once dry, I created stripes with 1.25" painters tape. To make sure the lines were even, I used small pieces of painters tape between rows to offset the stripes. The latches were a little tricky, I just tore smaller pieces to get in the crevices.


After taping, I removed my guide lines, pressed the tape down firmly to prevent bleed through and brushed on a custom mix of Behr Cool Lava and ASCP Barcelona orange. 

Once dry, for added protection, I brushed on a thin coat of clear polyurethane. 


I LOVE how bright and happy it is now. Thrifting is great because at a low price point, you can afford to experiment make things your own - so get creative and go bold!

--

Eames chair tutorial here, DIY painting here, DIY Gold Leaf print here


Tassels for the Campaign Dresser

Last week, I added a few DIY tassels to my campaign dresser and wanted to share a some photos!


To make them, I followed Kristin's tutorial from The Hunted Interior, found here. If you aren't already following Kristin, make sure that you are - you will be constantly inspired! Check out her summer house tour, recent breakfast nook, and outdoor oasis just to get started!


I whipped them up in about an hour, super easy!


Want to know something funny? I made these because a. I LOVE peonies and since I just purchased some, I needed something to photograph with them .. b. I've also wanted to try DIY tassels for a while, so this was the perfect excuse!! I guess peonies help me create :)


I hope you had a great weekend!! :)

Friday Five


TGIF! Who's ready for the weekend!? We're going to be traveling a good bit in the next few weeks for #projectentry, so I'm hoping to stay put and have a semi-relaxing weekend! 

Here's a few of my favorites from the past week! 

*Post contains affliate links 


West Elm recently release new color ways for one of my favorite duvet prints (See it in my home here and here). PlatinumAmethyst, and Yellow


If you missed my post last week on painting furniture (specifically laminate). Make sure to check it out! I shared a few recent tips that have been game changers for me .. 

Also, I forgot to mention that as David and I were carrying the dresser into the bedroom, we banged it on the door frame and there was no damage to the dresser! Love Kilz bonding primer and Sherwin Williams Pro Classic! Check out the details here


You all know that I love DIYing pillows, but every once and while I see one that I have to have .. this Greek Key pillow would be difficult and time consuming to DIY.. so when I saw it on sale, I grabbed it. This pillow is gorgeous in person, it's a white linen with a green (with yellow tint) embroidered Greek Key (the finishes make all the difference!) Trina Turk knows how to make pillows!! I picked it up on Amazon when it was on sale for $40, I've never seen it that low (maybe that seller was discontinuing it?), but keep an eye on the price! Check it out here.


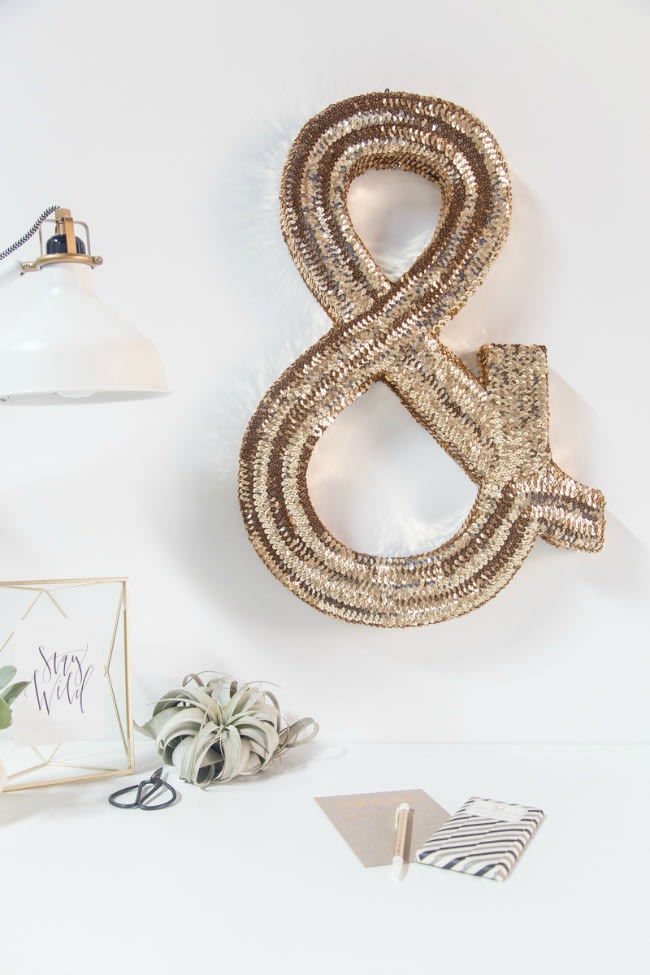
This sequined ampersand found on LuLu's is pretty amazing! I love that it doesn't require any fancy tools, is relatively simple and has a huge impact! 

Please pin from original source, here thanks! 

via LuLu's


Target Threshold X Stool: I see two of these at the foot of a mostly white bed or maybe two under a console table. At $59.99 these seem like a steal! 


Have a great weekend friends!! :) 

Creating with the Classics | Online Fabric Store + Premier Prints


If you're stopping by from the fabulous White Buffalo Styling Co., welcome!! So glad that you're here!


When Online Fabric Store approached us with the challenge to create something inspired by a classic book and the Premier Prints collection, we were instantly game. After all, I love a challenge!


We were randomly assigned a classic book .. I was gifted the theme of Huckleberry Finn .. My first thought was I don't have a boy or outdoorsy / cabin style so I was stumped initially. What I am going to do!? But, looking further, the main theme is the conflict between civilization and nature. Contrast? Now that's right up my alley! 

Using Premier Prints Zippy Cloud Denton, the fabric refers to the straight guidelines of society while the pom pom trim is more free form. The Black and White Vertical Stripe also shows the contrast between nature and civilization and the path between the two.  


I made a few envelope pillow shams. You won't believe how easy it is!

Envelope Pillow Sham Material and Cut list (for 18"x18" pillow):

36"x18" for two pillow fronts (cut in half and then cut half again at a 45, 4 pieces)
10" x 18" (back piece)
14"x18" (back piece)
2.5 yards of cording per pillow

Sewing machine
Thread
Fabric scissors
Iron
Pins

* For a fuller pillow, cut the the to the size of the pillow form and sew half inch seams, so the finished pillow size will be 1" smaller than the pillow form. 

Here's how I made the mitered stripe pillow, inspired by this gorgeous pillow by the talented Kassapanola.

1. First, cut a 36"x18" piece of fabric.

2. Then cut it in half (2 - 18"x18"pieces). Tip: fold in half, iron a crease, then follow that as a guideline - it's easy to cut a straight line!


4. Then create the pillow fronts. Cut each half at a 45. Reconfigure using the pieces as shown.

5. Put the faces together (right side in), line up the stripes and pin. Sew the pinned edge.


6. Apply cording the the edge. I opted to purchase pre-made cording, but it's easy to make your own if you'd like! On the face of the pillow front, hold the cording to the edge (finished side of cording towards the center), sew along the existing stitching.


For the corners, bend the cording (cutting a small slit on the edge helps it bend) 

7. Cut the back panels, 10"x18" and 14"x18" - On the 18" length of each piece finish the seams on one side of each piece. Fold the end 1/2" and fold over on itself (1" total) and sew. 


8. Place the front face (right side up) and layer the back pieces on top (right side together), pin and sew following the existing sewn line. 

9. Trim the corners with scissors and turn the sham right side out pushing out the corners. 


and that's it!


I reconfigured my vertical stenciled panels (tutorial on Houzz) as a horizontal feature wall.


Here's a peek into my office - it's coming together!


Love the pom pom and thin pink trim! It's super easy and gives a polished look!


A special thanks to Online Fabric Store for providing us with this fun challenge! Want to see more amazing prints from Premier Prints? Click here to see the full line!


Make sure to stop by Jennifer Rizzo, you won't want to miss her amazing project!!

House Update + Hump Day Giveaway Printable

Hey! Are you having a good week? I hope so :) Today I wanted to share a little bit from our weekend. We were in Maryland working on our entry.. It's definitely taking longer than we hoped, but we're getting close!

We found these poppies in our front yard, it's been fun seeing what's popped up this spring! Bud vases from Pottery Barn 

I took this pic right before we started working Saturday morning.


We left off about a month ago with almost all the tile laid out - we just had to cut the edge tiles. So we marked and cut on a tile saw. We opted to purchase verse renting since we're planning a few more tile projects and figured that it would save money in the end. We went with this mid priced one from Home Depot. In store, it seemed sturdy and well built. We've found that it's typically best to go with at least mid priced tools to save the aggravation of the tool not working properly or breaking (also check online reviews!) .. in the end it saves money!


It worked perfectly! We got all of the tile cut..


Since the baseboard trim doesn't cover the beams, it needs to be flush on those areas. There were some tricky cuts! (the edges just laid out in this pic so the spacing is a little off) Collapsible baskets from Pottery Barn and yellow garden stool from Home Goods.


I LOVE it!! Can't wait to finish this room - hopefully by the beginning of July!!


David also hung the Capri Pendant from Kenroy Home. Love it!!

Finally, in the spirit of home, a free printable!

Download your 8x10 copy, HERE

I hope you enjoy!! :)

Remember to tag me on Instagram @sarahmdorseydesigns if you use it, I'd love to see!

Looking for more free printables? Find more here

*For personal use only, resale isn't permitted

Make sure to come back tomorrow - I'm participating in a fun blog hop with some amazing bloggers, Online Fabric Store and Premier Prints Fabric!!

Recent Thrifting + Craigslist Finds

Hey! I hope that you had a great weekend! We worked on #projectentry .. more on that a little later, but we made progress!!

Today I want to talk a little about my recent thrifting and Craigslist finds.

David and I went to Florida on vacation a few weeks ago and also did a little thrifting .. we had big hopes to find something amazing and all we found was a pair of brass duck book ends and a triangle display box (seen in this post). So our truck came back empty .. then, when we came back to Knoxville we found TONS.

So, my number one tip if you're starting thrifting is, don't give up! It takes persistence, and you strike out more than you score .. See my other thrifting tips, here

Here's what we've found recently.

1. A goodwill just opened near me .. we went opening morning (there were news cameras, embarrassing since I basically just rolled out of bed) but look at what I found!!


It pays to get there early! The diving helmet is actually an ice bucket, it's missing the top, but at a $1 I figured I could use it as a planter or find/make a top. The brass duck bookend is an exact match for the pair that I got in Florida .. The smaller items were .50 - $1.00, the bench was $12, the brass lamps were $8 and the foo dog lamp was $5.

2. We found a Campaign set on Craigslist. The quality was pretty good (brand Bernhardt).. I wish the hardware was brass, but thats ok .. $160 for the set (hutch tops are removable)


I took the pic as the sun was going down .. so David had some fun with the slow shutter speed.


3. Last weekend we went to a vintage fair in Knoxville, we found an elongated octagon mirror, a carved wood ball (seen in this post) and a expandable rack (not sure what the original purpose was, thoughts?) $27 for everything.


4. In Maryland, we found this Dyrlund desk/vanity top (top section flips up to a mirror) (legs were missing) How cool are those circle pulls!? The condition is pretty rough, my first thought was paint, but once we found out that it was a MCM Danish piece, we're definitely going to try to refinish it, the condition will never be perfect, but thats ok.

My grandmother wants a desk, so if it turns out, I'm planning to give it to her! :)

p.s. here's the dress that I posted about Friday, pretty good for $11.99!!


I hope that you have a great week! I'll be getting caught up on some projects, blog stuff and things around the house .. love going to Maryland for the weekend, but I get behind!!
Powered by Blogger.