Chinoiserie Inspired Bamboo Nightstands

This week, we finished our bamboo project ... nightstands! Ever since we made the grasscloth + nailhead feature wall, I've wanted simple, open nightstands that wouldn't hide too much of the nailhead.

I've been playing around with a few options, but once I found the Skubb drawer at Ikea and thick bamboo on clearance at a local craft store, I was excited to get started! The plan included, a simple top that was built to fit around the drawer with bamboo legs for the base.


This project is a perfect example of how David and I work together ... he loved the idea of a box built to fit a fabric drawer, but the bamboo legs, not so much. I saw the bamboo and instantly thought they'd be perfect for legs (painted of course...) because they're different from standard lumber, add detail and cheap! David saw them and recognized that hollow = more difficult to attach and work with. 

David wasn't sure, but as usual, he was up to the challenge! We made our way to checkout ... $10 total for both nightstand bases!

Lets get started! 

First, below are the basic materials that we used to make the nightstands. Read on to see how we did it! 


After drawing up a plan, we made a box to fit around the drawer out of MDF. Prior to assembling the box we painted the inside while it was easy to access. 

First, we worked on the bamboo. We looked at the sections before we cut and for the most part, they were pretty straight. Prior to attaching them, we rotated them so that it would look as straight as possible.

Since they were hollow, we would need to put something inside so that the legs could securely attach to the top. After a little trial and error, we came up with cutting an insert out of a 2x2. Since all of the bamboo is different, we dipped the ends in paint as a guide and then cut it out with the jigsaw.

We then drilled through the 2x2 to insert a dowel rod (long enough to fit through the MDF as well). Prior to installing the dowel rod we put Gorilla Glue on the rod so that it would be extra strong. 

Then we inserted the entire piece into the bamboo leg using Gorilla Glue again. Finally, we inserted the leg into the top, using, you guessed it, Gorilla Glue. We decided to use Gorilla Glue because it is strong and expands into crevices once dry. 

I also drew a little diagram cutting through the nightstand to help explain. 


For the X on the bottom, we measured, and marked where they would go. Drilled a large hole, and then widened it to fit the curve of the bamboo with a cutting attachment on the dremel. The top piece of the X sits in the bottom, so we cut the bottom piece a little so it would sit. Finally, we used more Gorilla Glue to secure it. We used clamps throughout, so that it would bond tightly.

Since we were using something organic, a lot of pieces had to be custom fit to the shape of the bamboo.  Those steps could have been eliminated if we used pre cut lumber. Clearly we like to challenge ourselves ... sometimes yes, but actually we didn't know it would require this much customization when we started. I'm so glad that it turned out like I had envisioned in the end!

After it was built, I thought it looked a little skimpy/cheap at the top ... We used a little left over molding (cut at 45s and attached it with Epoxy) to add a little extra dimension and visual weight on top. Plus it's perfect so that things don't roll off of it! 

Prior to painting, we filled any cracks in the bamboo with wood filler and once dry, sanded. 

I primed it with Zinsser Cover Stain (two coats) and finished it with Sherwin Williams Pro Classic, Alabaster (two coats). 

Now onto my favorite part - the drawers! We used the Skubb drawer from Ikea with a fabric wrapped 1/8" piece of luan. First we measured and drilled where we wanted the panel to attach to the drawer. I wrapped it like the Rast dresser. Then I cut and sewed a loop on the front for the pull, and went through the pre-drilled holes with upholstery thread and a long needle (about 4 times per section). 


We decided to make the drawer fit snuggly so that it wouldn't fall out easily. I LOVE the organization that's included! It took about 30 seconds to put together too - since the organization is sewn into place. Also, it's soft on the bottom, so I don't have to worry about it scuffing the paint.


You can see the detail of the attached panel a little better in the photo below. 


A few week's ago we installed the guest room chandelier in our room. I love the soft light that it puts off. 


This the best straight on shot I can get since it's tight in front of the bed ... maybe I'll get a wide angle lens soon (any suggestions for a Nikon?) 


Love the added detail that the molding adds. I think it really helps to dress up the MDF. 

I picked up a candle from Target's fabulous selection (so many great one's to choose from!) Target is SO good recently! 


We could also put a basket on the bottom if we need extra storage, but for now we're good! Also, to hide the lamp wire, I used painter's tape to secure it on the back and then run it down the far leg. I've also seen a few tables using little 3M wire hooks too.


I swapped the organic chevron duvet for a lighter weight white coverlet for the summer (from TJ Maxx).

Cost Breakdown + Sources:

MDF: Habitat ReStore (left over from open shelving unit)
Bamboo: Beverly's (local craft store) $3 for each 8' pole (3 total), .50 small bamboo (2 total)
Zinsser Cover Stain Primer: Home Depot
Sherwin William Pro Classic Paint Alabaster
Skubb Storage Drawers: Ikea, $8 each
Fabric: World Market kitchen towel $4
Coral Striped Runner: Target

I had the paint and glue on hand so the total cost of the new parts was $30 or $15 each!

This is the last project for the bedroom, since we started redoing it in March, so I'll be giving a little tour of the projects soon!

My To Do List + a Free Download

Just a quick post today since I'm up to my ears in projects ... a few months ago I set a goal to get most of my unfinished projects out of my garage and into other people's homes by the time that my family visits in July. Well that deadline is fast approaching (this Monday) so I'm trying to get as much done before then (both of our cars are parked on the street, so it will be nice to park inside again). Yesterday I worked on three different projects at the same time alternating while paint dried, etc. Multitasking at it's finest :)

I'll be having a mini furniture sale this weekend, if you're local (central coast, ca) and interested in the chartreuse sofa table (rug from photo too, never used), secretary, small stenciled side table, dining table and 4 chairs, tufted ottoman and a few home accessories, let me know :)

Anyways ... I tend to get more done when I cross things off of a list, so recently I made a few to help motivate me. Not filled out completely, (my project's page would go all the way to the bottom), but it's a start!

If you'd like to download a copy, click HERE for the PDF.


If you need me, I'll be in the garage, covered in paint and sawdust :)

p.s. one of the projects that I finished yesterday was the one involving bamboo ... finished pics Thursday! and just wondering ... do you like updates on my projects along the way, or do you like to be surprised? I tend to do both, so I would love your input!

Eames Chairs FINISHED (finally + for now)

Hi Everyone! I hope that you had a great long weekend!! Today I have a VERY special guest, David! A lot of you have heard me talk about him and sing his praises. David is the brains behind figuring out a lot of our projects, so today I thought I would ask him to share how we (mostly him) refinished our Eames Shell chairs.

First here's a little background info on the chairs.

- November: I ordered a pair of Herman Miller/Eames shell chairs from Ebay and was SUPER excited when they came!

- Late November: I picked out a fabric to reupholster them ..

- December: Still researching reupholstering ... a little less excited

- January: Decided to get a quote from a shop in LA who specializes in Eames refurbishing (way too high for what we're looking for). Quote from a local reupholster - we ended up running out clutching to our chair after they dropped one on the floor and wanted to staple through the fiberglass.

- Late January: Decided that reupholstering them was too hard, sand off the foam, and expose the bare fiberglass.

- February-June: Sat in garage partially finished

In between and after there was a lot of sanding. David will go into the specifics of the sanding process, but it wasn't fun ... Also, just a reminder that this is how we did things, since we didn't have all of the correct power tools. So there would be a faster, easier way to do it with the right tools. I guess the excitement of the chairs overcame us :)

David will share our process!

--

Hey this is David, Sarah's husband and diy project partner. Last weekend, we finally wrapped up the eames chairs and Sarah ask me to share the process with you all today.


Sarah picked up the chairs from a seller on ebay who distributes a lot of mid-century modern furniture. The fiberglass was in good shape the aluminum bases were salvageable so we were excited to get started.


Unfortunately, the upholstery was shot. Annabelle is always obsessed with smelling any nasty upholstery and foam that comes on our project furniture...


First we removed the original upholstery. It is sewn to a plastic band that is formed to clamp the edge of the fiberglass around the whole chair. Starting a the joint in the middle of the seat, cut the first few threads to get it started and then begin prying it off working around the side. once around one side, it will pull off exposing the foam.


Using a plastic kitchen scrapper, we scrapped off the majority of the foam.


Now with the just the old glue remaining, its time to start sanding. With glue from the '70s and fiberglass, a respirator is a must (and long sleeves/pants). Using our orbital sander, I started with 120 grit and sanded off most of the glue. When the glue was almost gone, I switched to 220 grit and finished removing all the glue and worked on any spots where there was any scratches. I also sanded off the remaining clear on the back and bottom of the chair with the 220. I then went over the whole chair by hand with 320 grit to make sure there were no viable scratches from the sanding.


We visited a local shop that makes surfboards out of fiberglass to see what they use to seal the boards. They used Wet Look sealer by Behr from Home Depot. We tried it ourselves, though it went on shiny, it didn't dry shiny. Sanding more in between coats may have brought out the shine more, but after sanding the entire piece, we were sanded out. For now we will leave on the sealer and when we get back to Maryland, we are going to apply automotive clear glossy coat to the fiberglass (by a friend that we trust).

Whew, after all of the sanding to finish the back, it was time for more sanding to restore the bases...

The original clear coat was oxidized and the aluminum was full of dents and scratches. The first step was to remove the remaining clear and sand out all of the scratched and dents using a combination of hand sanding and the orbital sander with 120 grit.

front has no sanding, back is almost finished
Once all of the dents and scratches are out, its time to move up to a finer grit. I used 120, 220, 320, 400, 600, 800 (wet), and then 1500 (wet). We found some speciality metal sandpaper (for the higher grits) at a local hardware store. Whew! That is a lot of steps, Sarah helped at the end to make it go faster. Using more steps of sandpaper means that it will have a glossier, more flawless finish.


in between sanding, still a lot of scratches


After all of the hard work sanding, I used Mothers Aluminum Polish. This is the step that finally pays off. You take some of the compound on a rag, rub it on the metal until a black residue appears and then you buff the residue from the metal and you are left with a mirror like finish.

before and after
All in all, restoring these chairs is a lot of work but we saw at as a perfect opportunity to purchase these iconic chairs on the cheap and challenge ourselves with completely different type of project.


p.s. (this is Sarah) I may make a cushion for them too ... I ordered fabric, so fingers crossed, I can figure it out!

Project Updates + Knock It Off Premiere

Hi! I hope that you had a great 4th of July! We relaxed, worked on projects, went to the farmer's market and dinner with friends, and watched fireworks (of course :)

I haven't given you a project update in a while, so today I thought I would share what we're up to ...

The other week I shared these rattan chairs and table on Instagram. While at Goodwill, I didn't realize how disgusting they really were ... I tore off the nasty foam and fabric, wiped down the dirt covered rattan (took a shower) and then cut off the x's in the front with the jigsaw. We decided with the shape of the chair (mainly the lack of arms to break up the space) it looked a little bottom heavy. I filled in all of the holes with wood filler, sanded and primed with Zinsser Cover Stain (aka my new favorite primer, it sticks well, covers evenly, and won't easily flake off)

Just about ready for paint!

I also recently picked up these mid-century modern chairs for $20 each. The wood was in good shape, so I decided to stain rather than paint. The stain must be partially opaque because some of the wood grain came through and some was hidden (see photo below). 

Love the contrast in the wood! So glad that I decided to stain it. I'm thinking a light, slightly gray stain (let me know if you have a recommendation!)

Finally today we are working on a project with this bamboo ... these were on clearance (and for good reason ...) for $3.00 (smaller .50). Hopefully I'll have finished pics this Monday! Don't worry ... paint is definitely involved!


PS- If you're around this weekend, you've gotta check out Knock It Off! Monica and Jess from East Coast Creative Blog are the designers and hosts of this new DIY/Home Design show and it premieres this Sunday at 7pm!  Check out all the details here!


Statement Art Free Download

Thanks for all of your sweet comments on our round table makeover - you all make my day! The prints were also very popular, so I thought I would share a little more about them today.


Here's why I love them.

1. Easy + Super fast to make
2. Large and make a statement
3. Cheap

Does it get much better than that for art? :)

I created them in Illustrator, and since everyone doesn't have that program, I tried to find a way to create a large scale document with editable text (so you could make your own) with no luck ...

Instead, I made a few more files for you (Download PDF in the following links). Including: You are my sunshine, Follow your Dreams/Heart, and Never ever give up. If you would like something custom, feel free to email me at  sarahmdorseydesigns{@}gmail{.}com and I'll send you a similar PDF for $5.

The larger paper size is 16x20 and the smaller is 5x7, and fit in the frames I used (with mats) Ikea Ribba 1 and 2.

You can get the files printed at Staples or a similar office supply/print store. Ask for Engineering prints (quality is similar to a laser printer). I found it easiest to call my local staples, explain my project and email their store (ask for the store email address) directly with the PDFs and instructions attached. Each large print costs about $1.30.

Prints will have to be cut down to 16x20, you can do that yourself or Staples will do it for you.

If you have Illustrator or a similar program, the font I used is Lavenderia. In case you missed the file download yesterday, here is Enjoy the little things.


 Happy creating!

Roadside Rescue + Painting Laminate + Adding Crown Molding to Table Base

Sometimes my favorite projects come from the least expected places. A few months ago I found this laminate and oak table in the road outside of our house. I didn't think much of it at the time, but when David got home and asked if I saw the table outside, we decided to go check it out. We weren't sure about it, but we pulled it into the garage anyways and forgot about it for a few months.

This past week, we finally got around to finishing it and I'm in LOVE with the end result!!

Want to know the best part? It was basically free! I bought white paint for this and a few other projects, but other that that, we had everything on hand! 

Read on to see how we did it! 

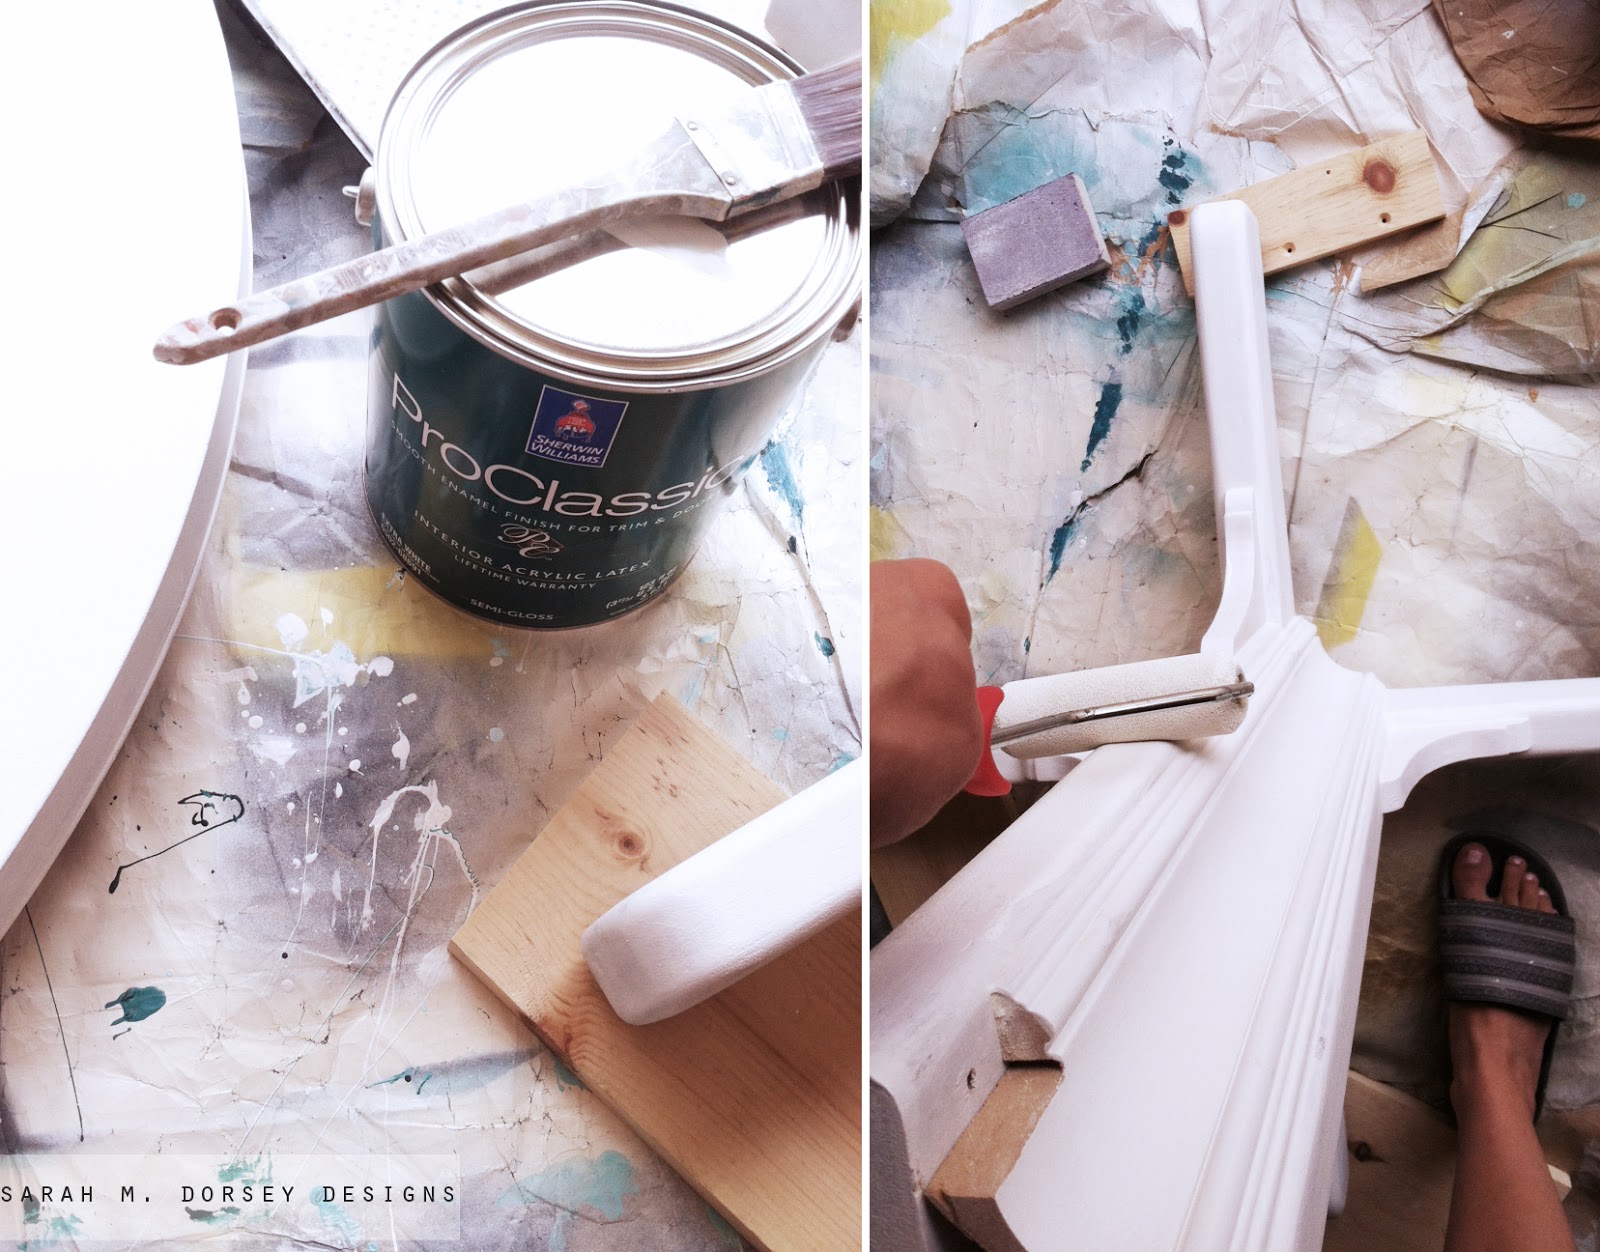
I primed the table a few weeks ago while I had the primer out and filled the holes with wood filler. Last weekend, David was playing around with a few pieces of scrap wood and found some crown molding that we purchased (from Habitat Restore) for another project, but didn't end up using. It fit PERFECTLY between the existing legs for a seamless transition. It's like it was made to go there! David cut it to size and cut a notch in the top for the existing table top mount to attach to. You can only see it when you are under the table, so we weren't worried about covering it up. 

We put wood glue on the edges of the crown molding and secured it to the base with small nails.  

To finish the base, we freehanded a corbel out of a 1x6 and then traced three more. David cut them out with the jigsaw and we attached them to the base with wood glue and finishing nails. We then filled in all of the cracks/seams and nail holes with wood filler.

After sanding and wiping down with a microfiber cloth I used my favorite primer, Zinsser Cover Stain. It sticks to glossy surfaces (though it is best to sand first) and it is SUPER durable!! I used two coats on everything and three on the top for extra durability. It is oil based, so that means it's stinky and the brushes need to be cleaned with mineral spirits (or use cheap ones that can be tossed).


 I finished with two coats SW Pro-Classic in Alabaster, a light creamy white.


We created a stencil in Illustrator and cut it on our Silhouette Cameo and stenciled it with a light gray, SW Big Chill.

Since the top is laminate and it will get a lot of use, I decided to add a few coats of water based polyurethane. Oil based poly will yellow over time on light surfaces, so water based is best for white paint.  

It is the perfect addition to our office! Extra work and dining space. It isn't too large or small and the round size makes it easy to move around. 


Notice something else?? We also finally finished the other Eames chair!!! Tutorial a little later :) I'm planning to put a few of the chairs that I recently found, once I refinish them. Updates on Instagram if you're interested. And then the Eames chairs will go back to the desk. 


I love love love the new table base! It makes to look so much more expensive!  


I was originally planning to paint the top in a bolder color/pattern, but I think the simplicity and low contrast works well with the other colors and patterns in the room.


Finally, I created a few prints using text and got them printed as Engineering prints at Staples. The quality is similar to a laser printer (so so quality), but a $1 something each is such an affordable option for large scale prints! I was inspired by the prints in Kristin's fabulous nursery, found here. 

You can download "enjoy the little things" HERE. It includes two 16x20 prints and one 5x7 print. You'll have to cut the 16x20 down yourself or Staples can do it too. I printed the 5x7 at home. Enjoy! :) 


Ahh SO much better!! Have you used crown molding in an unconventional way too? I'm officially obsessed and will be looking for more project ideas using it! 

Sources:

Table: roadside find, but craigslist and goodwill would be good places to look
Crown Molding: Habitat Restore (about .50 a foot) 
Primer: Zinsser Cover Stain, oil based, Home Depot 
Paint: Sherwin Williams Pro Classic 
Poly: Minewax Water based, Home Depot 
Stencil: Made by me
Frames: Ikea Ribba, here and here 

The office/living room is almost done, then I'll post more pics showing the whole space! :) 


Powered by Blogger.