How to Mix and Match Pillows | My Favorite Combos

Today I'm sharing something that I get asked frequently - how to mix and match pillows!

The key is to not be too matchy matchy, but keep it cohesive by following a basic formula.

1 floral or organic + 1 solid + 1 stripe + 1 small scale 

Of course, there are always exceptions to the rule, but the most important thing is to vary scale and pattern. You can see that 3. and 4. veer slightly from the rule. Don't know where to get started? Pick out one statement pillow (such as the Kate Spade Floral or Orangerie from below) pick colors from the pillow then vary scale and pattern for the other pillows. 

Here's a few pillow combinations that I came up with. 


1. banana leaf // navy deco pillow // channels // betwixt 

2. kate spade saturday floral // small dot // blue pom pom // black painted stripe 

3. blue fringe // marble // blue scallop // navy stripe // persimmon solid

4. orangerie // berry deco pillow // kelly wearstler katana // x pillow

I've been noticing lots of fresh florals and abstract painterly patterns popping up recently - love it!! So, do you have any favorite pillows or pillow combinations? I'd love to hear!

Coral and Bold Pattern | Pillow Shams for the Sofa

Hi! I hope that you had a great weekend! David had to work, so I was busy with a few projects, some cleaning and the laundry (no major incidents to report!)

I've been a bit of a fabric hoarder recently .. most of our linens are at our MD house, but the linen closet  in OH is full of my recent finds. Last week, I found Thom Filicia City Square for Kravet on eBay for 3 yards / $40 .. I've been obsessed with it for a few years, so even though I didn't have a specific project in mind, at that price, I had to grab it!

I made a few new pillows for the sofa the other weekend, and wanted to make a few more for the other side. So this weekend, I made a few more!


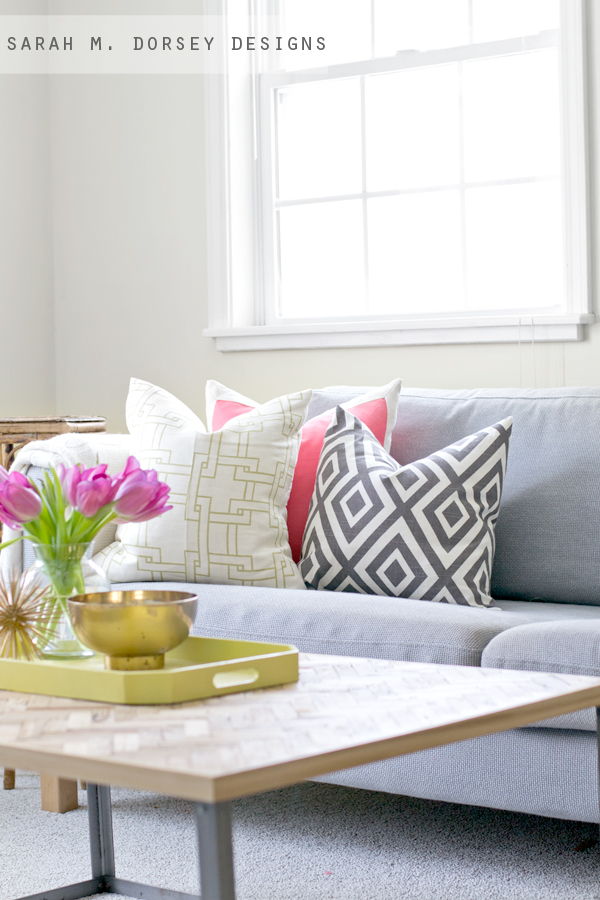
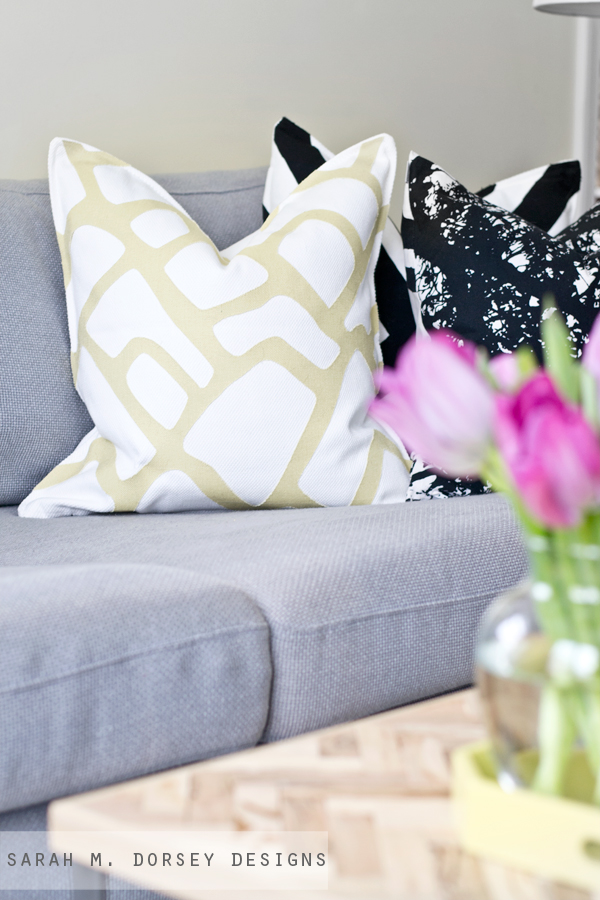
Solid coral with linen border, I had some coral left over from my greek key sham and the border is from a table cloth), gray diamond - Richloom Dixon Slub (originally purchased from fabric.com a few months ago, but I can't find it there), and Thom Filicia City Square for Kravet (purchased on eBay)

Coral and bold pattern is the perfect pick me up for this long winter!


Thrifting has been pretty slow recently, but I did find this brass bowl at Goodwill last week (and a little lucite clamshell)


Tutorial for my no-sew designer inspired pillows at Houzz. Perfect for anyone that has been looking for their favorite designer print with no luck or if you don't have a sewing machine.


Annabelle was there for a little bit too :)


Total cost was about $5 since I already had a lot on hand and I still have 2.5 yards of City Square left for another project!

--

Finally, thanks SO much to anyone who's voted for me in Apartment Therapy's Homies Awards (project + DIY category and home design + inspiration)!! Your support means so much!! :) Feel free to stop by and vote for all your favorite blogs!


Designer Inspired Pillow Shams | Stenciled Ikea Pillow Shams for only $3 each!

Hi! I hope that you had a great weekend!! Today I'm sharing a few super affordable pillow shams - I made them before we moved, so photos are taken from our CA home - if you are wondering if we have a gallery wall/shelving/rug etc. Not yet, but hopefully soon!

In case you missed the tutorial on Infarrantly Creative, read on to see how I made them!


I love this because you can simplify it to be finished in about an hour or you can spend a little more time to have a completely custom look! Want to know the best part? It only cost about $3-5 per pillow sham!

I started with $3 white pillow shams from Ikea. Then I picked up some fabric paint and fabric medium from Michaels. I decided to purchase the colors that I didn't have and also use leftover latex paint with fabric medium so that it would be washable after heat setting.


For my inspiration, I turned to my Pinterest boards (always a great way to see trends in what you like!) and picked the a few designs that I loved from Caitlin Wilson Textiles and Sarah Swanson's home


I started with two striped designs. It really doesn't get easier that this! For the diagonal stripes, I didn't even have to measure! :) I simply determined the width between stripes and offset it with two pieces of tape to keep the line straight and then laid the next piece of tape. For the wide chevron, I did measure, but still super simple! 


The most important thing is to press the tape down firmly so that the paint doesn't seep underneath the lines. Then I mixed up my paint, dipped my roller in, rolled off the excess (also important to get clean lines) and rolled away from the painter's tape to avoid build up around the tape. 

After that dried, I created an inexpensive trim by taping off the edge and brushed on a contrasting color. 


Now for my favorite part! I decided to create my own stencils based on Caitlin Wilson's Hong Kong and Scallop fabrics. Download my silhoutte files for free Hong Kong inspired HERE and HERE (2 part stencil) Scalloped HERE. I drew the patterns in Adobe Illustrator and cut the stencil on my Silhouette Cameo. You could also pick up a few stencils at your local craft store for a simpler method. 

I've been making stencils for about a year and have learned that not everything can be easily translated into a stencil. To get the thin gold lines instead of a gold fill on the Hong Kong inspired stencil, I created a two part stencil, the first to capture the outer edge of the cube, and the second to finish the inside. A little extra effort, but I was able to achieve the exact look I was going for, so definitely worth it! 

If you've never stenciled before, here are a few tips. 1. Lay and tape paper over your table, tape the sham down, center the stencil and use painters tape to secure your stencil in several places to avoid it moving 2. dip your brush in paint and wipe off excess on a paper towel before starting, you want a small amount of paint on the brush to avoid it going underneath the stencil. 3. Hold the stencil down with your other hand as you go to prevent it from coming up 4. Carefully line up the next row so that the pattern stays consistent. 

Allow the paint to dry completely and heat set with a white cloth between the pillow and iron on a low setting. 


I decided to mix the painted shams with my DIY greek key sham and a pillow made out of the left over fabric from my Mid Century Modern refurbished chairs, Caitlin Wilson's tall mint chevron. 


I didn't paint the backs, but that would be a great way to add a contrasting color or pattern to have a reversible sham! 


I'm loving our new pillow shams! Most of all, I LOVE the price! 

Here's the breakdown:

Ikea Gurli Sham $3, qty 4 $12
Paint and Fabric Medium $6 (with coupon at Michaels) 

Total: $18 

I had the fabric for the mint chevron pillow left over and the Greek key sham was a previous DIY, but this project could be easily done for under $30 depending on your fabric selections! 


10 minute pillow shams for the Living Room

Sorry for the late post today, things have been crazy recently!

Last week I shared a few fabrics that I ordered from fabric.com. The coral was a little pinker than I was anticipating, but I loved it and David didn't hate it, so I decided to go with it!


Yesterday I finished making a few new pillow shams for the living room. I decided to try Jenny's 10 minute simple envelope sham and it was the perfect!

fabrics L to R 1. 2. 3. (in blue, no longer on website) 4. 5. 


I followed Jenny's instructions and I added a few tips of my own.


1. I measured the width of the existing sham and added .5" on the two long sides for seam allowance. I placed the existing sham on the end of the fabric and folded it over once, I then added about 4-6" for overlap at the end. (a 20"x20" pillow should be about 20"x46")

2. I folded the short end over .5" and ironed, 3. folded over once more to cover all raw edges. 

Repeat on other short side. 

4. I sewed the two short sides where I created the hem. 5. I then folded the fabric (right side in) I placed the sham to the side and adjusted the fabric until it was the same length and pinned in place.

5. I sewed the two open ends 6. and finally snipped the corners so that they would stick out easily. I then turned it right side out and pushed the corners out. These were so fast to make!


I also added small black pom pom trim the outside of one sham, using this tutorial. Since the tutorial above only sews two sides (the other two don't have seams) you need a front piece and two back pieces so that you can sew the pom pom trim to all four sides.


1. + 2.  After cutting the front to size (.5 inch seam allowance on all sides) I sewed the pom pom trim around the outside 3. I cut out the back pieces with 4"-6" overlap and sewed around the outside. 


I love how fun and bright they are. Perfect for spring! I still need to add trim to the solid coral sham. I ordered some online (after not finding anything locally) so it should get here in the next few days :) 


The pillow on the chartreuse caning chair got a new cover with this fabric.


Annabelle loves her new seat!


You may have noticed that I moved the furniture around ... I plan to move (or sell) the sofa table and replace it with a taller open shelving, like Ikea's Vittsjo


I also love having the TV in the corner so is no longer a focal point. It fits perfectly here! 


Almost done! Just a few more things ...

Also on the list:

Tall open shelving
Rug in seating area
New ottoman/coffee table 

Stay tuned to see the trim on the solid coral pillow!

How TO apply greek key trim to a pillow


Victory! Yesterday, I successfully applied the greek trim after my first failed attempt. My process was very similar, but a few key differences that made ALL the difference. 


Here's how I did it. 


First, I got out my cutting mat, metal ruler with cork backing (for anti-slip), and my xacto knife. I used basically the same measurements as my first attempt, with a few tweaks to accommodate the new shams. For a standard sham (mine are these), I used {16} 4", {8} 6", {2} 7", and {2}14" pieces of ribbon (diagram a few images down). My ribbon is 7/8" pewter grosgrain ribbon from Joanns, Wal-Mart has the same though.

I started by cutting the end at a 45, the cutting mat made this easy because I could line the ruler from corner to corner of the 1" square. For the edge to be clean and straight, it helps to hold tightly on the ruler and change your blade frequently (I have a pack of 100 I purchased on Amazon since buying a few at a time is so expensive and I use them a lot) 


Then measure your desired length for the straight edge. Again, the cutting mat helps with this too, since each square is 1". My measurements above are from the tip of the 45 to the straight edge. and repeat this for all of your pieces.


I love putting my hiccups on here because you help me figure them out! A big thank you to Jani for giving me the idea to burn the ends!


I found that using a lighter gives the most control since you want it to be as even as possible. I did use a candle (to save my finger) for a lot of the ends. Since that gets covered, it isn't as important if it is straight.


Then I centered it on the pillow (adding up the entire width and height and subtracting the respective difference from the ends). It's really easy to get the spacing off, I recommend laying it all out and double checking your measurements before adhering.

 * pink outline shows original ribbon and how the edges meet.

I started with the long 14" piece on the bottom (45 pointed left and straight edge right) and worked right overlapping the 45s on the straight edge. After testing two samples of adhesive that I had (to make sure that it didn't show through) I used one roll of 3/4" heat n' bond super. Last time I used heat n' bond regular and had issues with it showing through, but I'm thinking that it's because I had to iron so many corners that it got too liquid and bled through. The important thing is not to iron too long. I had my iron on fairly hot, pressed for a few seconds and then if it felt pretty secure, I would move to the next. It's hard to tell until it is cool if it is really adhered, so I went back at the end and touched up any spots that were a little loose. For the touch up spots, I flipped the sham over and ironed from the back. The extra layer of fabric helped prevent it from getting too hot and bleeding through. Make sense? :)

I tried to make the heat n' bond as close to the edge as possible, but after I was finished, I put little pieces in the corners that needed a little more and then ironed. and make sure that your iron is dry (I had just dumped out the water in mine).

and that's it! This was so much easier to get precise then folding every corner and ironing!!


It took about 30 minutes to cut and seal the trim per pillow and about an hour to hour and a half to lay it out and iron it down. So about 1.5 to 2 hours per pillow.

Also, for those who don't want to cut at a 45, cutting straight with scissors would also work well and give a very similar look!

Price breakdown:

Ribbon - pewter grosgrain 7/8" x2 = $4.00
Heat n' Bond 3/4" Super = $2

Total = $6

So is it worth the time or would you rather buy? I think it's worth it, but that may be because I enjoying doing this kinda stuff :)

Also, I haven't forgotten about the trim on the draperies for the bedroom ... just trying to find something that doesn't cost more than the draperies themselves ... looks like I may be adjusting my idea!

--

Update: Also see my latest tutorial on how to apply greek key trim with one continuous piece of ribbon, here


Home Stories A2Z

TDC Before and After

Updated Master Bedroom Pillows


Yesterday I made a new sham for the throw pillow on our bed. I knew better than to photograph it with the Greek Key sham ... because now I really like it. I think I'm going to have to find a way to make the Greek Key work. Check out yesterday's post for more info on what went wrong with my sham.

For my new pillow, I used the same fabric, Waverly Enlightened Pumice from the fabric wrapped table and added a small yellow pom pom trim.

I've gone over simple envelope shams before, but in case you missed it, here's how to make one:

Measure the existing sham or use the measurements from the pillow (mine was 25"x15"). For a fuller pillow you want to shrink the measurements by about an inch (based on the pillow measurement or if the existing sham is baggy.)

Add about .5 inch for seam allowances on all sides. Cut the front (26"x16") and the back should be a few inches longer. Cut the back into two pieces (14"x15" and 17"x15") or total 5 inches longer than the front. Remember to allow fabric for seam allowances and try to make your cuts as straight as possible, this will help in lining it up later.

I purchased half a yard and didn't have enough for the back piece, so I took the extra width from my first cut and sewed it on the end of the back piece. I covered it by the top of the envelope, but could be fun in a different color too!


For the back pieces, finish the edges that will make up the envelope enclosure by folding .5 inch ironing, and folding another .5 inch, pin and then sew those two edges.


Assemble the pieces inside out.


Pin and get ready to sew!


I started the pom pom trim by pinning just the first few inches in place, I then sewed slowly and put it in place as I went. Since the pom pom trim is so skinny, it can be very easy to miss when you are sewing. Once I placed it, I found it helpful to guide it through with two fingers on either side of the pom pom, a few inches in front of the needle. A reminder to go very SLOW so you don't accidentally sew over your finger, always move your finger when it is close to the needle.

I did miss a few spots, so I went back and hand stitched the openings.


Isn't the pom pom trim fun? I love texture that it adds!


I also added new sheets (Tahari from TJ Maxx) ...


I did a little more research and think I have a better idea of how to make the Greek Key trim work, I'm about 90% sure it will work ... check back!
Powered by Blogger.