
Here's a little background info on the design: We wanted it to be on the far side of the room since its out of the walkway and can accommodate the lowest ceiling height of the space. Originally, we considered building it on the same plane as the original closet but at 4 feet deep, the storage was awkward and it concealed the ceiling detail. The post on the exterior wall (left) is a structural part of the house whereas the one on the right and the top beam were decorative and used to create the original closet opening. The ceiling beams divide the room into 3 sections so we wanted to repeat that in the built-in. We went through a few options for the middle but ending up deciding on shelving behind the bench so that the wall and horizontal beam were still visible.
Before:

After:
After a lot of drawing and modeling in SketchUp, I came up with a plan and David figured out the construction details. This was the part of the project David was looking forward to so I'll let him take this part!
(p.s. were were under a time crunch, so I didn't get photos of every step, sorry!!)
--
Hello everyone! I don't post much for Sarah but hope to be more involved in the near future with more woodworking and renovation projects. Although I've been a primarily silent partner in the blog, I equally enjoy your feedback and support for our projects - so thanks again for reading and participating!
I was dying to get started on the built-ins as they were the perfect reason to get more tools and start a new project. Because this is a custom project (and we would change a few key things about our process), I'll go through our process rather than a full blown tutorial. I'll start with a quick lessons learned...
When building any type of cabinet with drawers and doors - build a complete cabinet box, then place it and use trim to cover any gaps.
Our walls are not straight, so building the cabinets in place (verse building a box and then placing it) cost us a lot of extra time. This is what we did, but again, we would recommend using a similar technique, but building them outside and then placing them.
We started by cutting the sides of each closet which becomes the main structure of the built-in. Because these would support the bench and drawers, I used 3/4" birch plywood (ready to paint and very sturdy/heavy). (Sarah's note: These were HEAVY, together we struggled to get them in the cart.) We ripped the plywood to height and then cut it into 4 sections. The widths had to accommodate the 6" posts on the outer sides. and were all cut 3/4" short so we could add a solid wood edge for durability.

When fitting the side panels into place, it was clear just how bowed the drywall was, On the back wall, it protruded over 1.5" in the center. I had to cut a curved section from the whole side touching the drywall to ensure everything was square and even with the horizontal beam.

I used 3" strips of the plywood with pocket holes to attach the sides to the wall at the bottom and pocket holes (using the Kreg Jig) in the sides to attach to the horizontal beam.
I then installed maple 1x2s across the front that would serve as the top of the top and bottom for the drawer openings. I then cut square sections of plywood for the top of the closets and secured them with pocket holes from the inside of the closet sides.

For the solid edges, I ripped 3/4" strips of poplar and glued them on all of faces. One dry, they were sanded to be flush with the birch plywood. This gives a smooth surface for paint and a much more durable edge than the plywood.

Next, I installed a frame for the closet and bench bottoms. I used sections of extra 3/4 plywood and attached them to the back wall, sides and face boards to create a shelf for the bottom to sit on. I used 3/4 plywood for the bench bottom and 1/2" for the closet bottoms since they didn't need to support a lot of weight.
Now for the drawers -
Because of the 6x6 post in the rear corners, the outside drawers could only be 18" deep and the center drawer we made a full 24" deep. All of the drawers are 10" tall so I ripped and all of the sides from 1/2" birch plywood. I then ripped a 1/4 groove into the bottom of each side panel. I ripped the drawer bottoms from 1/4" birch plywood 1/2" larger than the length and width of the drawer's inside dimensions to sit in groove. The sides were glued and screwed together around the bottoms.
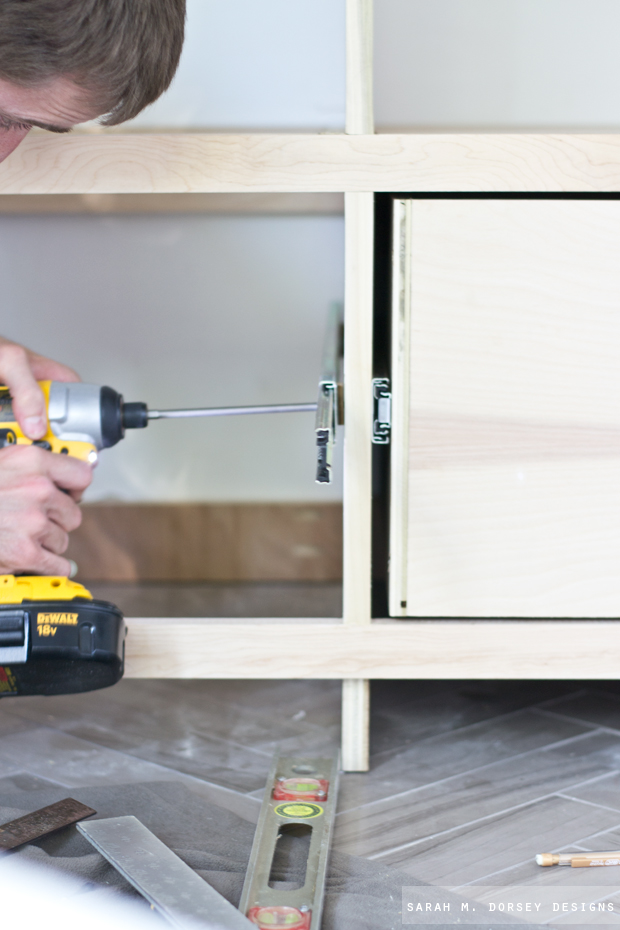
Next, I installed the drawer slides. We used These ball bearing, soft close, ones from Home Depot. I had to shim some of them to ensure they were completely square (again why I would recommend building the cabinet boxes and then installing).

Now for the front panels. I purchased this tongue and groove router bit set to make the shaker panels.
I started by ripping 3" sections of poplar and cutting them to length. I then used the groove router bit to cut a 1/4" grove on the inside of all of the edges. Next, I used the other bit to create a tongue on the outside of the shorter sections.

For the closet doors, I created a center support with a grove on the top and bottom. For the drawers, I used 1/4 birch plywood for the inner panel. For the doors, we used aluminum grating. To secure the aluminum, we cut 1/4" strip of the plywood that could be glued in the groove to create a tight fit. (Long clamps help hold it together while it dried)

We purchased this aluminum sheeting (x4) for the center inserts.

Since the groove was bigger than the metal insert, we placed thin strips of wood in the gap (on the back side) to make up the difference.

We test fit the doors, installed the drawer fronts with screws from inside the door and then pulled them off for paint. We left the inside of the closets unfinished (Sarah will probably paint them in the future ..)
Finally, for the feet, we traced a metal lid for the curve and drew the straight lines on 3/4 birch plywood and cut with a jigsaw. Then traced it for the remaining three (edges were half of the middle)
The whole built in wasn't a quick process but I think it turned out well for our first attempt. Since I didn't get into all the details, be sure to leave a comment if you want more details on any specific step!
--
Thanks David for sharing! As you can see, this wasn't easy clearcut, straight forward tutorial .. since this was our first time making built-ins it was definitely a learning process. Thanks so much for letting us share all aspects of our DIY adventures. In the end, we're SO happy that it turned out well, but we won't be repeating our process again .. p.s. David has been talking about making kitchen cabinets from the beginning (I've been apprehensive ..) I think this has made him reconsider :)

Here's a few detail shots.

The two end drawers were 18" deep (verse 24" deep like the center) due to the beam in the back and in the front)

We plan to make vertical dividers so the drawers can hold more shoes.

The bench cushion is made from Neo Toile, Coral from Tonic Living. My mom started it and then I finished it.

Hardware was provided by D Lawless, found here and here. I LOVE the large size!

Metal cubby baskets were provided by Pottery Barn, they have rubber bumpers on the bottom to prevent damage. They are the perfect size for mail, dog leashes, scarves, etc.

Woven baskets were found at Home Goods.

We decided to include shelves on the back wall instead of continuing the bench to provide extra storage. Also, since the bench isn't designed for lounging, there was no need for extra space. It's perfect for putting on shoes before going out the door!
One last before.

and after.
The built-ins were a lot of work, but we LOVE how they turned out!
Sources + Links:
Metal cubby baskets Pottery Barn
Cabinet hardware, here and here DLawless
Aluminum metal sheeting
Woven Baskets, Home Goods
Bench cushion fabric, Neo Toile, Coral Tonic Living
Tile installation post, Room reveal post
Thanks so much to DLawless for providing the cabinet hardware and to Pottery Barn for providing the metal cubby baskets! As always, I only share products that I love!
Make sure to come back tomorrow for more info on the gallery wall!


0 comments:
Post a Comment