

He's how we did it!
We decided to give the rug a little extra interest by offsetting the stripes, similar to this rug from Ikea. It only took a little extra effort and probably made it a little easier to keep the tape straight. Definitely worth it!
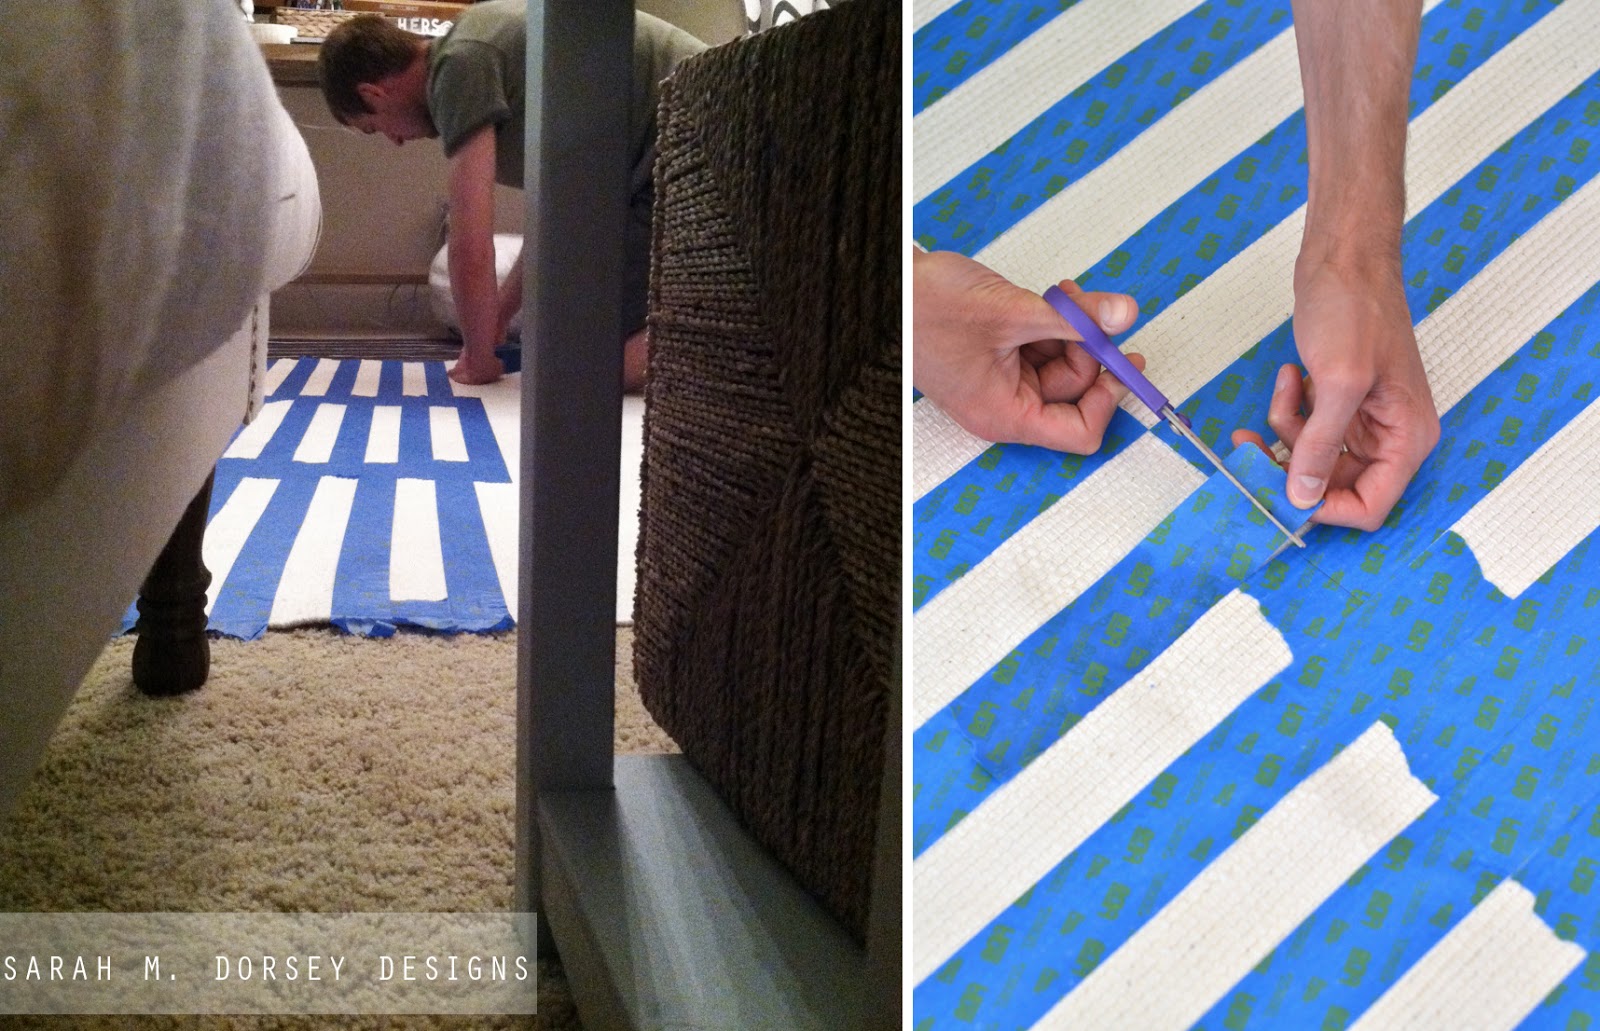
We divided the rug into thirds, starting in one corner we laid a piece of 3m edge seal 2" tape (a little over a third of the rug so there would be overlap). We repeated, using little pieces of the 2" tape to set the offset between stripes.
After all of the tape was laid out, we measured the thirds again, drew a line with a pencil, and cut the tape down the pencil line. At first we used scissors, but then moved to lightly cutting it (not through to the rug) with and xacto knife. It moved faster since we didn't have to lift the tape up and reattach it.

I then walked around on the tape to make sure that it was secured to the rug... Annabelle thought I was crazy ... I put paint tarps around the edges to protect the carpet (always a must!) Then I mixed up a custom gray with flat paint that I had laying around the house and started rolling it on! I did three light coats (letting it dry in between) until there was even coverage.
The only thing that I would of done differently was carry it down to the garage. As you can see from the first picture, we did it in the office area and it was very cramped! It took some interesting maneuvers get around the wet paint. Rolling on an even surface (instead of the carpet underneath) would of been easier too.
I took the tape off and that was it! This was such an easy and fast way to get a large graphic pattern.


The living room is really coming together! Just a few more finishing touches!

Sources/Price breakdown:
Ikea Erslev rug: Already owned, but Ikea doesn't carry it anymore (anyone know of a good substitute?)
Painter's tape: 2" 3M Edge Seal painter's tape $8 - Wal-Mart (we used exactly one roll, I know random!!)
Paint: Custom mixed light gray from leftover Behr and Glidden flat paint - Home Depot
Total Cost: $8 (since I had everything but the tape on hand!)
If you haven't tried a striped rug yet, you MUST! It is super fast/easy and can add the perfect punch of contrast, pattern, color to a space!


0 comments:
Post a Comment